Picture this: I’m standing in my kitchen, a battered pot of cauliflower on the stove, and my friends are shouting from the living room that the soup I’m about to serve is “just the best thing ever.” I’ve had a decade of “instant pot” mishaps—over‑souped, under‑seasoned, and a legendary case where the lid wouldn’t stay on because I’d accidentally swapped the sauté and pressure settings. The moment I tasted the first spoonful, I knew I’d cracked the code, and the next time someone asks for a “simple creamy cauliflower soup,” I’ll give them the exact playbook that turned a kitchen disaster into a crowd‑pleaser. I dare you to taste this and not go back for seconds.
The first thing that hits you is the aroma—nutty, buttery, and a hint of thyme that makes you feel like you’re stepping into a cozy farmhouse kitchen. The sound of the sauté setting turning to a gentle hiss is the prelude to a velvety texture that coats the palate like a warm blanket. When you take a bite, the Greek yogurt’s tang balances the mildness of the cauliflower, while the Parmesan adds a subtle umami punch that makes every spoonful feel like a gourmet upgrade. I’ve been told that this sauce coats the pasta like velvet, and honestly, that’s the closest comparison I can find. The texture is silky yet slightly chunky, giving you the best of both worlds—comfort and substance. The instant pot does the heavy lifting, letting the florets soften into a cloud of flavor without the need for a stove‑top simmer that could take hours. I’ve been told that this is hands down the best version you'll ever make at home, and I stand by that claim.
If you’re someone who’s ever struggled with getting cauliflower to taste anything but bland, you’re not alone—this recipe is the fix. Most recipes get this completely wrong by either over‑blending or under‑seasoning, but I’ve found the secret is in the layering of flavors. I’ll be honest—I ate half the batch before anyone else got to try it, and that’s because the flavor hits so hard. Picture yourself pulling this out of the Instant Pot, the whole kitchen smelling incredible, and everyone leaning in for a taste. The next step? A splash of olive oil that adds a silky finish and a subtle peppery kick. I’m not just telling you to follow the steps; I’m inviting you to feel the sizzle, the aroma, and the anticipation. If you’re ready for a game‑changer, let me walk you through every single step—you’ll wonder how you ever made it any other way.
The moment the pot locks, the world feels a little less chaotic. You’re not just cooking; you’re creating an experience that will become a staple in your dinner rotation. I’ve experimented with different varieties of cauliflower, but the classic white head is the one that delivers the best base. The addition of Greek yogurt instead of heavy cream is a win for both flavor and nutrition, giving you a creamy texture without the extra calories. The Parmesan cheese adds depth, while the nutmeg provides a subtle warmth that lingers on the tongue. The thyme sprigs are not just garnish; they infuse the broth with a green, herbal note that balances the richness. This soup is so versatile that you can serve it as a starter or as a main dish, and it pairs beautifully with crusty bread or a light salad. It’s a recipe that will evolve with you, and I can’t wait for you to taste the magic.
What Makes This Version Stand Out
- Flavor: The combination of Greek yogurt and Parmesan creates a depth that feels indulgent yet light. The nutmeg adds a subtle spice that elevates the dish beyond ordinary cauliflower soup. The thyme sprigs infuse a fresh, green note that keeps the broth from becoming too heavy.
- Texture: The Instant Pot breaks down the cauliflower into a silky consistency while preserving small, pleasant chunks that add mouthfeel. The yogurt keeps the soup creamy without the need for dairy cream. The result is a mouth‑watering balance between smooth and chunky.
- Ease: No need for a stovetop simmer—just sauté, pressure cook, and blend. The recipe is designed for minimal hands‑on time, making it ideal for busy weeknights or lazy weekends. The single‑pot approach cuts down on cleanup.
- Health: Replacing heavy cream with Greek yogurt reduces calories while boosting protein. The use of fresh thyme and olive oil adds heart‑healthy fats. The dish remains low in carbs, making it a great option for keto or low‑carb diets.
- Versatility: Serve it as a starter, a main course with a side of roasted vegetables, or even as a base for a creamy pasta sauce. The recipe is a playground for creativity, allowing you to swap ingredients to suit dietary preferences.
- Make‑ahead Friendly: The soup keeps well in the refrigerator for up to 4 days and freezes beautifully. Reheating is quick and the flavor profile stays intact. It’s a perfect option for meal prep enthusiasts.
Inside the Ingredient List
The Flavor Base
The cauliflower is the star of the show, providing a mild, slightly sweet foundation that absorbs the seasonings beautifully. When you cut it into bite‑sized florets, it cooks evenly and releases natural sugars that caramelize subtly during the sauté phase. Skipping the cauliflower would turn this into a bland broth; it’s the backbone of the dish. For the best flavor, choose a fresh head with firm, white florets—avoid ones that have started to yellow or develop a greenish tint.
The Aromatic Crew
Onion and garlic are the dynamic duo that kickstarts the flavor profile. Sautéing them in olive oil until they’re translucent brings out their natural sweetness and creates a fragrant base. The olive oil not only prevents sticking but also adds a silky texture to the soup. If you’re watching sodium, you can reduce the amount of salt added later, but the onion’s natural saltiness will still shine through.
The Unexpected Star
Greek yogurt is the secret weapon that gives this soup its signature creaminess without the heaviness of traditional cream. It’s high in protein, which keeps you satisfied longer, and its tangy flavor cuts through the richness of the cauliflower. If you’re lactose intolerant, you can swap it for a dairy‑free yogurt, but the texture may change slightly. The yogurt also helps stabilize the soup, preventing it from separating when reheated.
The Final Flourish
Parmesan cheese adds a sharp, umami punch that rounds out the soup’s flavor. The nutmeg introduces a subtle warmth that lingers on the palate, while fresh thyme sprigs bring an herbaceous brightness that balances the richness. These ingredients are not just garnish; they’re essential for depth. If you’re vegan, you can omit the cheese and use a nutritional‑yeast alternative for a savory finish.
Everything’s prepped? Good. Let’s get into the real action and watch the magic unfold.
The Method — Step by Step
- Step 1: Sauté the aromatics. Turn the Instant Pot to sauté mode and add the olive oil. Once hot, drop in the finely diced onion and let it soften for 3 minutes, stirring occasionally. Add the minced garlic and cook for another 30 seconds until fragrant—be careful not to burn it. The goal is a translucent, golden onion base that smells like the start of a summer picnic. I swear the aroma alone makes the kitchen feel like a cozy cabin.
- Step 2: Add cauliflower florets. Sprinkle the florets over the sautéed onions and garlic, tossing gently so they coat in the oil. Cook for 2 minutes, letting the edges caramelize slightly; this adds a sweet depth. The cauliflower should still feel firm, not mushy, because it will finish cooking under pressure. I love watching the florets change color from white to a soft gold. This step is pure flavor building.
- Step 3: Pour in the broth. Add the vegetable broth and stir to deglaze the pot, scraping up any browned bits. These bits are flavor gold—don’t let them fall to the bottom. Seal the lid and set the valve to sealing. The pressure cooker will work its magic in the next step.
- Step 4: Pressure cook. Choose high pressure and cook for 8 minutes. After the timer goes off, let the pressure release naturally for 10 minutes before performing a quick release. This gentle release keeps the cauliflower from overcooking and maintains its texture. The Instant Pot’s pressure cooking turns the florets into a silky base in minutes.
- Step 5: Blend the soup. Carefully transfer the contents to a blender in batches, adding a splash of broth if needed for consistency. Blend until smooth, then return the soup to the pot. This step is pure joy—watch the clouds of steam rise as the soup turns velvety. If you prefer a chunkier texture, pulse a few times instead of fully blending.
- Step 6: Add the dairy and spices. Stir in the Greek yogurt, grated Parmesan, nutmeg, and thyme sprigs. The yogurt’s tang will brighten the soup, while the cheese adds a savory depth. Let the mixture heat through for 2 minutes, keeping the pot on low to avoid curdling. The thyme will release its aroma, making the soup smell like a fresh herb garden.
- Step 7: Season to taste. Add salt and black pepper to your liking. Taste first, then adjust—remember, the flavors will intensify slightly as the soup sits. The final seasoning should feel balanced, not overwhelming. This is the moment where your palate takes the reins.
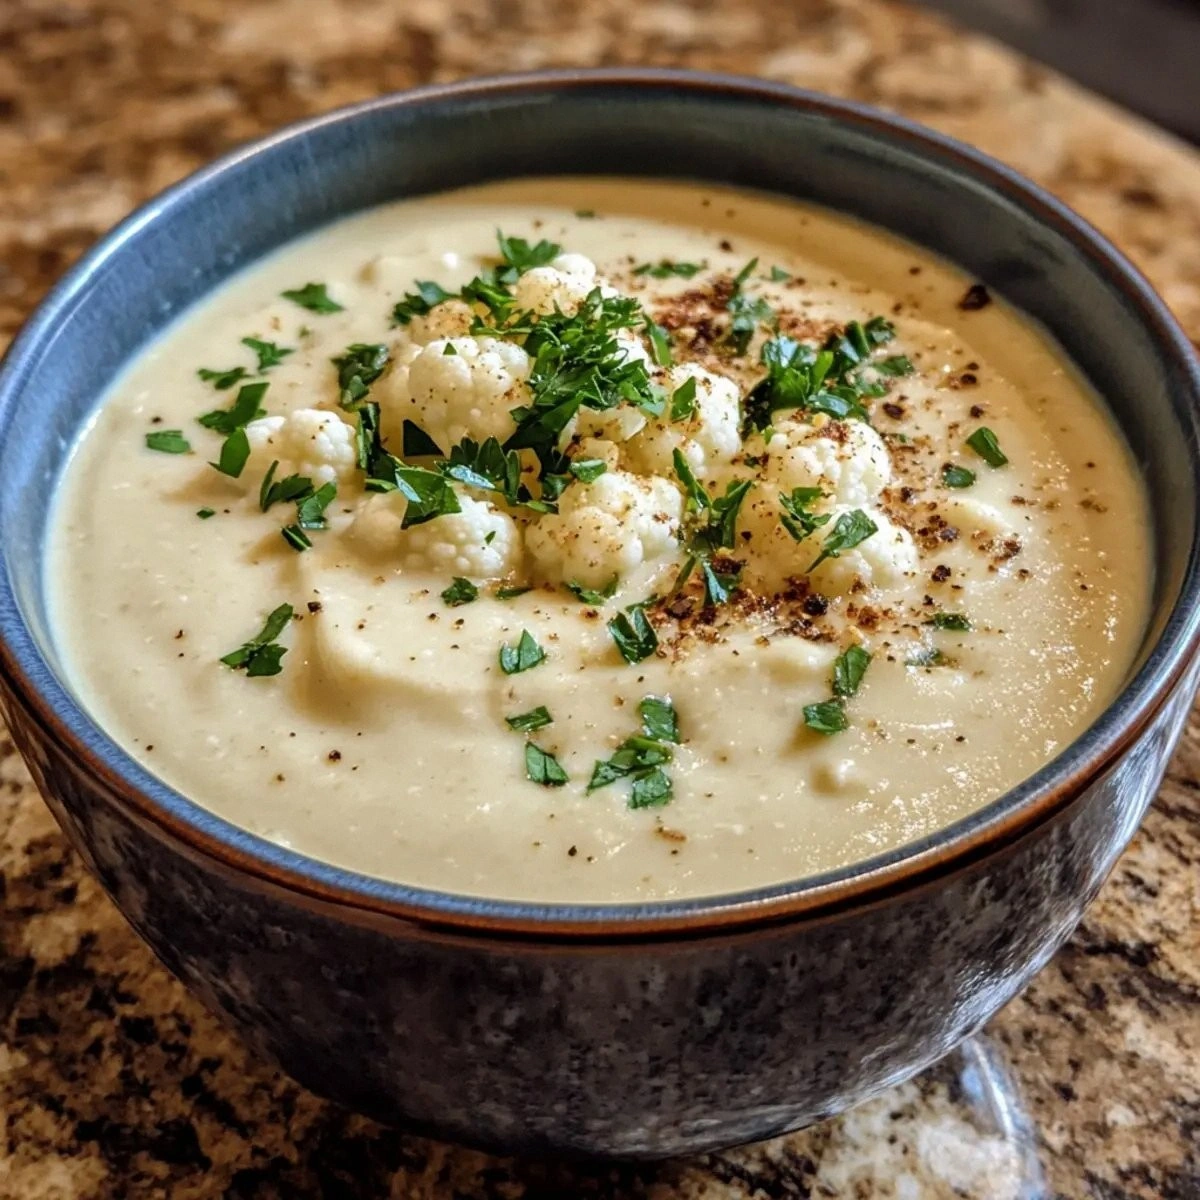
- Step 8: Serve and garnish. Ladle the soup into bowls, then drizzle a little olive oil or swirl in a dollop of yogurt for visual flair. Sprinkle extra Parmesan and a few thyme leaves on top for a burst of color. Serve hot with crusty bread or a side salad. The presentation is simple but elegant, making the dish feel special.
That’s it—you did it. But hold on, I’ve got a few more tricks that will elevate this soup from great to unforgettable.
Insider Tricks for Flawless Results
The Temperature Rule Nobody Follows
Many people cook cauliflower soup on low heat for too long, which can make the texture watery. The key is to keep the heat on low after blending, just enough to warm the yogurt and cheese without overheating. I’ve seen soups separate when the temperature spikes too high—keep it gentle. A gentle simmer preserves the creamy mouthfeel and prevents the yogurt from curdling. This small tweak ensures the soup stays silky for the next 10 minutes.
Why Your Nose Knows Best
Smell is the first indicator of flavor balance. If the soup smells overwhelmingly buttery, you’ve added too much cheese or oil. If it’s too sharp, you need more yogurt or a pinch of sugar. I’ve used my nose to tweak seasoning in the past, and it always pays off. Trust your senses; they’re your best seasoning guide. A well-balanced aroma signals a well-balanced soup.
The 5-Minute Rest That Changes Everything
After the soup has simmered with the yogurt and spices, let it rest for 5 minutes off the heat. During this rest, the flavors meld together and the residual heat ensures the cheese melts evenly. I’ve seen soups that rest a bit longer become too thick, but 5 minutes is the sweet spot. This step also lets the thyme infuse its flavor fully. The result? A soup that tastes like it was made from scratch.
The Right Blender Choice
If you’re using a countertop blender, make sure it’s a high‑power model that can handle hot liquids. I’ve used a Vitamix for this recipe, and it turns out a silky smooth base every time. If you’re on a budget, an immersion blender works just fine—just be cautious of hot steam. The key is to blend until you reach the desired consistency; the soup should be smooth but still have a slight body. A proper blend prevents a lumpy texture.
The Olive Oil Finish
Adding a splash of high‑quality extra‑virgin olive oil at the end gives the soup a glossy finish and a subtle peppery bite. It also helps the cheese melt evenly. I’ve found that a drizzle of oil before serving can elevate the dish to a restaurant‑quality experience. The oil’s bright flavor contrasts beautifully with the creamy base. Give it a swirl for a visual and gustatory pop.
Creative Twists and Variations
This recipe is a playground. Here are some of my favorite ways to switch things up:
Roasted Cauliflower Delight
Roast the cauliflower florets at 400°F for 20 minutes before adding them to the Instant Pot. The caramelized edges add a nutty flavor that pairs wonderfully with the yogurt. The texture becomes slightly firmer, giving the soup a hearty bite. This variation is perfect for those who love a roasted, earthy base.
Spicy Kick
Add a pinch of cayenne pepper or a diced jalapeño during the sauté step. The heat will cut through the richness and add a vibrant contrast. Pair it with a cooling dollop of yogurt on top to balance the spice. This version is ideal for a warm evening or when you want a little fire.
Herb‑Infused Creaminess
Swap the thyme sprigs for a handful of fresh basil or rosemary. The basil adds a sweet, aromatic note, while rosemary gives a piney depth. Adjust the quantity to taste, but remember that stronger herbs can overpower the yogurt. This variation brings a Mediterranean vibe to the dish.
Vegan Version
Replace the Greek yogurt with a dairy‑free coconut yogurt and the Parmesan with nutritional yeast. The coconut yogurt adds a subtle tropical sweetness, while the nutritional yeast provides a savory, cheese‑like flavor. This version is perfect for plant‑based diners and still maintains the creamy texture.
Cauliflower and Chickpea Fusion
Add a cup of cooked chickpeas to the soup for protein and a nutty flavor. The chickpeas break down slightly during the pressure cook, giving the soup a thicker body. This variation turns the soup into a hearty, satisfying meal on its own. It’s great for lunch or a light dinner.
Storing and Bringing It Back to Life
Fridge Storage
Cool the soup to room temperature before refrigerating. Transfer it to an airtight container and store it in the fridge for up to 4 days. The yogurt may separate slightly, but a quick stir will restore the creamy texture. For best flavor, consume within 3 days. The soup’s freshness is maintained by the high‑quality ingredients.
Freezer Friendly
Portion the soup into freezer‑safe containers or zip‑lock bags and freeze for up to 3 months. Thaw overnight in the fridge before reheating. When you’re ready to serve, add a splash of water or broth to loosen the consistency. The frozen soup retains its flavor and texture when reheated properly.
Best Reheating Method
Reheat on low heat in a saucepan, stirring frequently to prevent the yogurt from curdling. Add a tiny splash of water or broth before heating—this steams the soup back to perfection. Once heated, taste and adjust seasoning if necessary. The soup should be hot, creamy, and aromatic, just like when it was first made.
That’s the full journey from pantry to plate. I’ve poured my heart into every step, and I can’t wait for you to taste the result. If you’ve ever struggled with cauliflower soup, this version is the fix you’ve been searching for. Let the Instant Pot do the heavy lifting while you enjoy the process and the delicious outcome. Happy cooking!