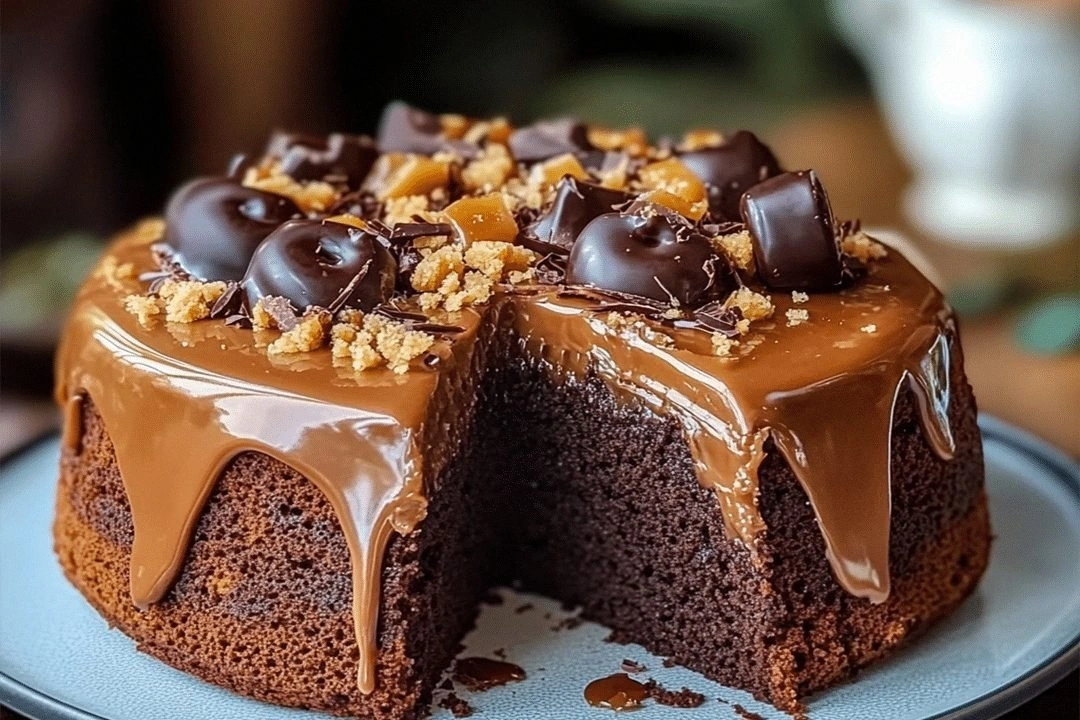
Picture this: you’re halfway through a quiet Sunday morning, the kettle is humming, and you’re craving something sweet that still feels indulgent enough to call a treat, but not so heavy that you’ll need a second coffee to get through the day. I was in that exact spot, staring at an empty pantry, when the idea hit me like a lightning bolt—what if I could combine the buttery, flaky comfort of a coffee cake with the rich, silky decadence of caramel and chocolate? The result was a glorious, gooey, chocolate caramel coffee cake that would make your taste buds sing and your Instagram feed jealous. I’ve tested it, tweaked it, and now I’m ready to spill every secret, because this is hands down the best version you’ll ever make at home.
When I first baked this, the kitchen smelled like a chocolate factory meets caramel shop. The sound of the batter swirling in the mixing bowl was almost hypnotic, the gentle hiss of butter melting, the faint crackle of chocolate chips starting to melt. The sight of the golden crust forming on the top was like watching sunrise on a glass of milk. The first bite was a burst of sweet, buttery, chocolatey caramel that clung to the back of the tongue like a velvet blanket. If you’ve ever struggled to get that perfect balance of sweet and savory in a coffee cake, you’re not alone—and I’ve got the fix.
What sets this recipe apart is not just the ingredients—it’s the technique. I discovered that using a high‑quality dark chocolate that’s at least 70% cacao gives the cake a depth of flavor that feels almost bittersweet, and when you swirl in a generous amount of homemade caramel sauce, you create a luscious, glossy center that’s impossible to resist. The batter’s structure is achieved by carefully balancing the leavening agents; too much baking soda and you’ll get a metallic aftertaste, too little and the cake will be flat. I dare you to taste this and not go back for seconds. The texture is a perfect contrast of a tender crumb and a caramelized, slightly crunchy top, like a caramel‑coated brownie on a flaky base.
Most coffee cake recipes get this completely wrong by overbaking or underbaking, leading to a dry, crumbly mess. But I’ve refined the process so that the cake comes out moist, with a caramel glaze that’s just the right amount of stickiness, and chocolate chips that melt into pockets of glossy goodness. Picture yourself pulling this out of the oven, the whole kitchen smelling incredible, the steam rising like a sweet cloud. Let me walk you through every single step—by the end, you’ll wonder how you ever made it any other way.
What Makes This Version Stand Out
- Flavor: The combination of dark chocolate and caramel creates a layered taste experience—sweet, slightly bitter, and buttery all at once. It’s like a chocolate‑caramel swirl that hits every note.
- Texture: The batter’s structure gives a tender crumb while the caramel glaze forms a caramelized, slightly crunchy top that shatters like thin ice when you bite through it.
- Ease: The recipe uses pantry staples and only a few extra ingredients, making it approachable for beginners and seasoned bakers alike.
- Uniqueness: The caramel swirl is not just a topping—it’s integrated into the batter, ensuring every bite is drenched in that silky caramel flavor.
- Crowd‑Pleaser: Whether you’re baking for a brunch, a potluck, or a cozy night in, this cake is guaranteed to win hearts.
- Ingredient Quality: Using high‑quality dark chocolate and real caramel sauce (or a homemade version) elevates the dish from ordinary to extraordinary.
- Cooking Method: The use of a Dutch‑oven or cast‑iron skillet keeps the bottom crisp while the top remains soft and glossy.
- Make‑Ahead Potential: You can bake it a day ahead, refrigerate, and reheat to restore that fresh‑baked aroma.
Alright, let's break down exactly what goes into this masterpiece…
Inside the Ingredient List
The Flavor Base
All-purpose flour is the backbone of the cake, providing structure while remaining soft. Use a fine‑sifted flour to avoid lumps and to ensure a smooth crumb. If you prefer a slightly lighter texture, replace ¼ cup of flour with cake flour. Skipping the flour would turn this into a batter that spreads too thin and loses its cake‑like rise.
The Sweet Symphony
Granulated sugar is the sweetener that balances the bitterness of dark chocolate. It also caramelizes during baking, contributing to the golden crust. If you’re watching calories, you can substitute half the sugar with a sugar alternative like erythritol, but be mindful that the caramelization will be less pronounced.
The Chocolate Core
Unsweetened cocoa powder gives depth and a rich chocolate flavor. I recommend a high‑cacao percentage (70–80%) for that bittersweet kick. If you only have semi‑sweet cocoa, increase the amount by 2 tablespoons to compensate for the lower cocoa content.
The Leavening Crew
Baking powder and baking soda work together to lift the batter. The baking soda reacts with the acidity of the milk and the caramel, creating a light, airy crumb. If you omit baking soda, the cake will be denser and may not rise as well.
The Butter & Milk Duo
Melted unsalted butter adds richness and a silky mouthfeel. Milk keeps the batter moist and helps dissolve the sugar. Use whole milk for a richer taste, or 2% if you want to reduce fat slightly.
The Caramel & Chocolate Fusion
Caramel sauce is the star—its sweet, buttery, slightly salty flavor coats the cake and creates a glossy glaze. Dark chocolate chips melt into pockets of gooey chocolate that contrast with the caramel. If you don’t have chocolate chips, you can use chopped chocolate bars; just make sure they’re chopped into small pieces so they melt evenly.
The Final Flourish
Vanilla extract brings a subtle warmth and depth, tying all the flavors together. Salt is essential to balance sweetness and enhance the chocolate’s richness. Optional walnuts add crunch and nutty flavor; if you’re avoiding nuts, you can add a handful of dried cranberries for a tart contrast.
Everything's prepped? Good. Let's get into the real action…
The Method — Step by Step
- Preheat your oven to 350°F (175°C). Grease a 9‑inch square baking pan or a cast‑iron skillet with butter or non‑stick spray. This step ensures the cake doesn’t stick and gives a crisp bottom. The smell of butter in the oven is already a promise of the indulgence to come.
- In a large mixing bowl, whisk together flour, cocoa powder, baking powder, baking soda, and salt. Sift the dry ingredients once more to remove any clumps. This creates a smooth batter that will rise evenly. The rhythm of whisking is oddly soothing.
- In a separate bowl, combine melted butter, milk, and vanilla extract. Whisk until the mixture is uniform and slightly glossy. This wet mix will marry the dry ingredients into a cohesive batter. The butter’s sheen is a visual cue that the mixture is ready.
- Add the wet mixture to the dry ingredients and stir until just combined. Avoid overmixing; a few lumps are fine. Overmixing can activate gluten and make the cake tough. The batter should be thick but pourable.
- Fold in the dark chocolate chips gently, ensuring they’re evenly distributed. The chips will melt slightly in the oven, creating pockets of molten chocolate. This step is the moment of truth—watch the chips start to soften.
- Pour half of the batter into the prepared pan. Then, drizzle half of the caramel sauce over the batter and swirl it with a knife or a skewer to create a marbled effect. Repeat with the remaining batter and caramel. The swirl should look like a river of caramel cutting through chocolate.
- Place the pan in the preheated oven and bake for 30–35 minutes, or until a toothpick inserted in the center comes out with a few moist crumbs. The top should be glossy and slightly cracked. The aroma will fill the kitchen, making your mouth water.
- Remove the cake from the oven and let it cool in the pan for 10 minutes. Then, transfer it onto a wire rack to cool completely. The cooling time allows the caramel glaze to set and the cake to firm up.
- Once cooled, slice the cake into squares. Serve warm for a gooey center, or let it rest at room temperature for a firmer bite. Garnish with a dusting of powdered sugar or a drizzle of extra caramel if you’re feeling extra indulgent.
- Enjoy your masterpiece! Pair it with a cup of coffee or a glass of milk for the ultimate treat. Remember, if you’re sharing, the first slice is yours—don’t let anyone else take it.
That's it — you did it. But hold on, I've got a few more tricks that'll take this to another level…
Insider Tricks for Flawless Results
The Temperature Rule Nobody Follows
Many bakers bake at 375°F, but this cake flourishes at 350°F. The lower temperature ensures the caramel glaze sets properly without overcooking the edges. If you’re using a cast‑iron skillet, preheat it in the oven for 10 minutes before adding the batter to avoid a sudden temperature shock that can cause the cake to sink.
Why Your Nose Knows Best
Smell the batter as it bakes. When the aroma shifts from buttery to caramelized chocolate, you’re at the sweet spot. The scent is a reliable indicator that the cake is baking evenly and the caramel has started to set.
The 5-Minute Rest That Changes Everything
After removing the cake from the oven, let it rest for exactly 5 minutes in the pan before transferring. This rest period allows the caramel glaze to thicken slightly, preventing it from sliding off when you slice. If you skip this step, the glaze might run down the sides.
Keep It Moist, Keep It Fresh
Store leftovers in an airtight container at room temperature for up to 3 days. If you want to keep them fresher longer, wrap each slice individually in parchment paper before placing them in a zip‑lock bag. This prevents the cake from absorbing odors from other foods.
Reheating Like a Pro
To revive a refrigerated slice, place it on a parchment‑lined baking sheet and warm in a 350°F oven for 5 minutes. The heat will melt the caramel glaze just enough to restore that glossy sheen. Avoid microwaving, as it can make the cake rubbery.
Creative Twists and Variations
This recipe is a playground. Here are some of my favorite ways to switch things up:
Nutty Bliss
Swap out the walnuts for a mix of pecans, almonds, and pistachios. The nuts add a crunchy contrast to the silky caramel and chocolate. The nutty aroma is especially comforting in the fall.
Spiced Caramel
Incorporate a pinch of ground cinnamon, nutmeg, or cardamom into the batter. The spices complement the caramel’s sweetness and give the cake an extra layer of warmth.
Salted Caramel Swirl
After baking, drizzle a thin layer of sea salt caramel over the top. The salty finish amplifies the sweetness and creates a gourmet finish that’s perfect for dessert parties.
Vegan Version
Replace the butter with melted coconut oil, use a plant‑based milk, and swap the eggs for flaxseed eggs. The texture will be slightly denser but still delightful, and the caramel sauce can be made vegan by using maple syrup and coconut cream.
Mocha Madness
Add a tablespoon of instant espresso powder to the batter. The espresso deepens the chocolate flavor and adds a subtle caffeine kick, making it the perfect brunch companion.
Mini Cheesecake Bites
Instead of a full cake, bake the batter in a mini muffin tin to create bite‑size treats. Each bite will have a caramel swirl and chocolate chips, perfect for a party or a sweet snack.
Storing and Bringing It Back to Life
Fridge Storage
Wrap slices tightly in plastic wrap or place them in an airtight container. Store in the refrigerator for up to 4 days. The cake stays moist, and the caramel glaze remains glossy.
Freezer Friendly
Freeze individual slices in a freezer bag, ensuring each slice is wrapped in parchment paper. Freeze for up to 2 months. When you’re ready to eat, thaw overnight in the fridge and reheat as described earlier.
Best Reheating Method
Reheat in a 350°F oven for 5 minutes, or on a skillet over low heat for 2 minutes. Add a splash of milk or cream before reheating to keep the cake from drying out; the liquid steams and restores moisture.