Picture this: a Tuesday night, the fridge yawns open, and you’re staring at a lonely bag of tortilla chips, a half‑empty jar of salsa, and a lingering craving for something that screams comfort without the hassle of a five‑course dinner. I was in that exact spot, half‑laughing at my own laziness, half‑panicking because the kids were already at the kitchen table demanding “something yummy”. That moment of culinary desperation birthed what I now swear is the most unstoppable, cheesy, crowd‑pleasing dish you’ll ever lay your spoon on. I call it Mexican White Trash Casserole, and trust me, it’s a game‑changer.
The moment the sauce hits the pan, you hear that satisfying sizzle, a sound that whispers, “we’re about to create magic”. The aroma of browned meat mingles with the smoky kick of taco seasoning, while the cheese melts into a glossy, golden river that coats every noodle, bean, and chip like a velvety blanket. The kitchen fills with a scent that’s simultaneously nostalgic—like a backyard BBQ with a twist of Tex‑Mex flair—and fresh, as if a lime had just been sliced. My tongue tingles in anticipation, and the heat from the oven promises that first bite will be a crunchy‑soft symphony.
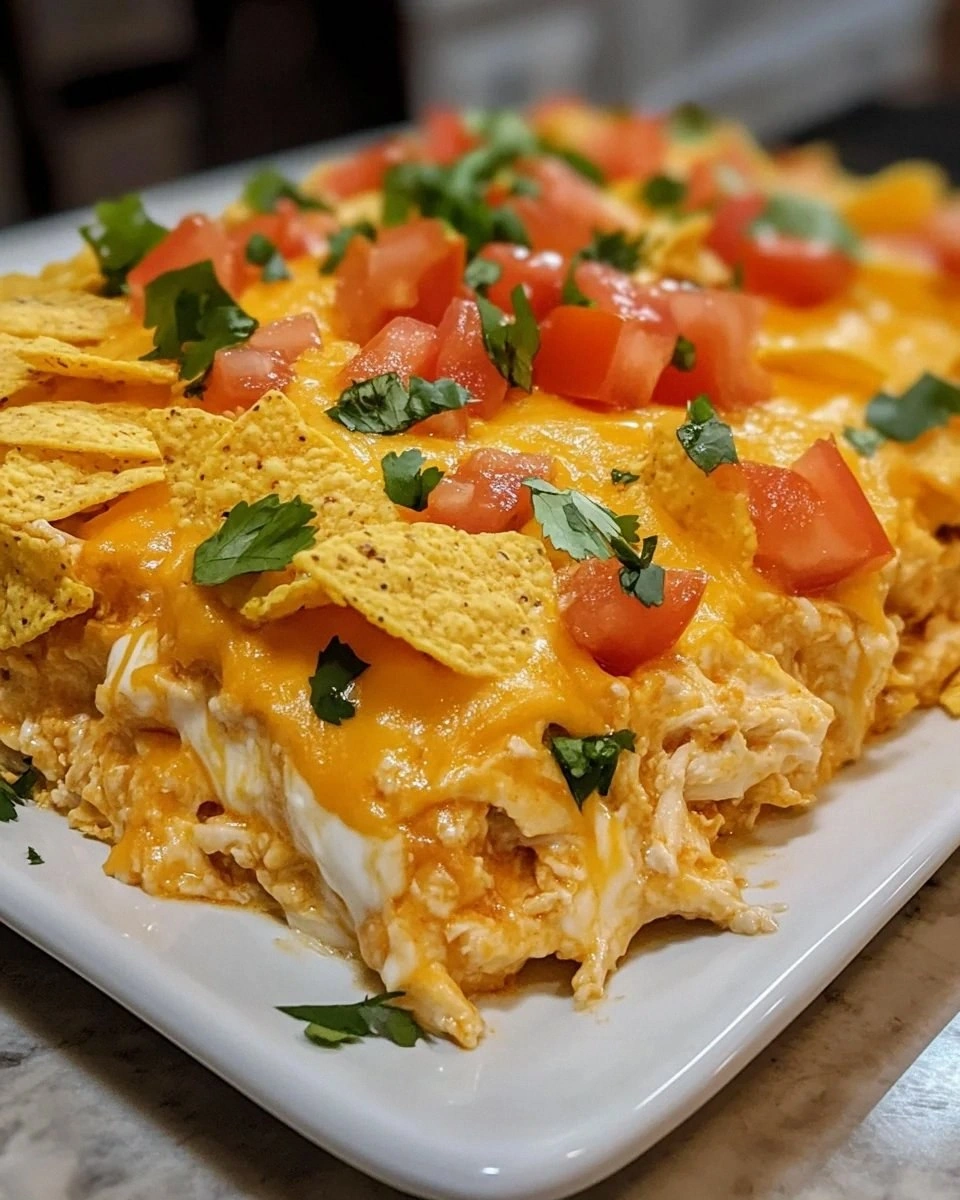
Most casseroles out there either drown in sauce or leave you with a dry, bland mess. Most recipes get the texture completely wrong—either soggy or overly crispy, never that perfect middle ground where the cheese stretches just enough to pull away in glorious strings. This version flips the script: I’ve layered crunchy tortilla chips at the base, a creamy cheese‑salsa blend in the middle, and a final crown of shredded cheddar that turns golden and crackles like thin ice on a winter pond. The secret? A splash of sour cream folded in at the end, giving the whole thing a buttery richness that makes every bite melt in your mouth.
And here’s the kicker you won’t find in any other blog: I’m swapping the usual heavy cream for a modest dollop of sour cream, and I’m toasting the tortilla chips just before they go in, ensuring they stay crisp even after the 30‑minute bake. This tiny tweak transforms the casserole from “good enough” to “hands down the best version you’ll ever make at home”. I dare you to taste this and not go back for seconds. Let me walk you through every single step — by the end, you’ll wonder how you ever made it any other way.
What Makes This Version Stand Out
- Flavor Explosion: The combination of taco seasoning, salsa, and a double‑cheese blend creates layers of heat, tang, and creaminess that dance on the palate.
- Texture Harmony: Crunchy tortilla chips, creamy cheese sauce, and tender beans give you a bite that’s simultaneously crisp and melt‑in‑your‑mouth.
- Simplicity: All ingredients are pantry‑friendly, and the steps are straightforward—perfect for a weeknight rush.
- Unique Twist: Toasted chips at the bottom keep the base from getting soggy, a trick most recipes overlook.
- Crowd Reaction: Kids and adults alike declare it “the best comfort food ever”, and leftovers taste even better the next day.
- Ingredient Quality: Using freshly grated cheese and high‑quality salsa makes the difference between “meh” and “wow”.
- Cooking Method: Baking at a high heat (425°F) gives that coveted cheese‑crust without drying out the interior.
- Make‑Ahead Potential: Assemble ahead of time, refrigerate, and pop it in the oven when guests arrive—no stress.
Inside the Ingredient List
The Flavor Base
Ground beef is the backbone of this casserole, providing a juicy, meaty foundation that absorbs the taco seasoning like a sponge. I use a full pound because it gives the dish enough protein to satisfy hungry appetites without overwhelming the other components. If you skip the beef, you’ll lose that rich, umami depth, and the casserole will feel flat. A great swap for a lighter version is ground turkey, but be sure to add a splash of olive oil to keep it moist.
The Texture Crew
Crushed tortilla chips are the unsung heroes. They form a crunchy base that prevents the casserole from turning into a soggy mess. When you toast them lightly, they become golden and fragrant, adding a buttery note that pairs perfectly with the cheese. If you’re gluten‑free, opt for corn chips or even crushed pork rinds for an extra punch of crunch.
The Unexpected Star
Sour cream might seem like a simple garnish, but folded in at the end it creates a silk‑smooth sauce that ties the whole dish together. Its tang cuts through the richness of the cheese, balancing the flavors. Skipping this step results in a heavy, one‑dimensional casserole. For dairy‑free diners, a dollop of coconut yogurt works surprisingly well, adding a subtle tropical twist.
The Final Flourish
Cheddar and Monterey Jack cheese are the dynamic duo that delivers both sharpness and meltability. Shredding them yourself ensures they melt evenly and develop that irresistible golden crust. Pre‑shredded cheese often contains anti‑caking agents that can affect texture. If you’re feeling adventurous, sprinkle a pinch of smoked paprika into the cheese mix for a smoky depth that’ll make your guests gasp.
Everything's prepped? Good. Let's get into the real action...
The Method — Step by Step
Preheat your oven to 425°F (220°C). While the oven warms up, line a 9×13‑inch baking dish with parchment for easy cleanup. This high heat is crucial; it creates that coveted cheese‑crust while keeping the interior moist. I always set a timer for the preheat—don’t walk away, because a properly heated oven makes all the difference.
In a large skillet, brown the ground beef over medium‑high heat. Break it up with a wooden spoon until no pink remains. As the meat sizzles, sprinkle the taco seasoning, and stir until the spices coat every morsel. You’ll hear a faint pop as the seasoning releases its oils—listen for that, it signals flavor is unlocking. If the pan looks dry, add a splash of water to keep the meat juicy.
While the meat cooks, toast the crushed tortilla chips in a dry skillet over medium heat for 2‑3 minutes, stirring constantly. You’ll notice a nutty aroma and a deeper golden hue—this is the moment that guarantees crunch. Transfer the toasted chips to a bowl and set aside; they’ll form the buttery base of the casserole.
In a separate saucepan, combine the salsa, sour cream, and a splash of water (about ¼ cup). Warm gently over low heat, stirring until the mixture is smooth and slightly thickened. This sauce should coat the back of a spoon, creating a velvety texture that will coat the rice and beans later. Taste and adjust with a pinch of salt if needed.
Now assemble: spread the toasted tortilla chips evenly across the bottom of the prepared baking dish, pressing them gently with the back of a spoon. This creates a sturdy, crunchy foundation that won’t sog up. Next, layer the seasoned ground beef, followed by the cooked rice, black beans, and corn kernels, spreading each layer evenly.
Pour the warm salsa‑sour‑cream sauce over the layered ingredients, making sure it seeps into every nook. Then sprinkle the shredded cheddar and Monterey Jack cheese generously on top. The cheese should cover the surface like a snow‑capped mountain, ready to melt into a bubbling, golden crust.
Slide the dish into the oven and bake for 25‑30 minutes, or until the cheese is bubbling and the edges start pulling away, forming that irresistible crispy border. Around the 20‑minute mark, peek through the oven door; you should see the cheese turning a deep amber, and a faint, toasty scent wafting out—this is the “pure magic” moment.
Remove the casserole from the oven and let it rest for 5 minutes. This short rest allows the cheese to set slightly, making slicing cleaner. Garnish with freshly chopped cilantro for a burst of freshness and a dash of lime juice if you like a citrusy zing. Serve hot, and watch as the first spoonful pulls a string of cheese that stretches like a lazy cat.
That's it — you did it. But hold on, I've got a few more tricks that'll take this to another level...
Insider Tricks for Flawless Results
The Temperature Rule Nobody Follows
Most home cooks set the oven to 350°F for casseroles, but that temperature never gives you the perfect cheese‑crust. Cranking it up to 425°F creates a rapid caramelization on the cheese while keeping the interior moist. I once tried the lower temp and ended up with a rubbery top—lesson learned. So, trust the heat and you’ll get that golden edge that shatters like thin ice.
Why Your Nose Knows Best
Before you even peek through the oven door, trust that aromatic cue. When the cheese starts to smell nutty and slightly toasted, you’re within minutes of perfection. If the scent turns overly burnt, pull it out early. Your nose is a more reliable timer than any kitchen gadget.
The 5‑Minute Rest That Changes Everything
Allowing the casserole to sit for five minutes after baking isn’t just for aesthetics; it lets the steam redistribute, making each bite uniformly moist. I’ve seen people cut straight out of the oven and end up with a soggy center. This short pause also makes the cheese set just enough for clean slices.
Cheese Blend Secrets
Using a blend of sharp cheddar and mellow Monterey Jack gives you both bite and melt. If you only use one cheese, you either lose flavor depth or meltiness. A pro tip: add a pinch of smoked paprika to the cheese mix before sprinkling; it adds a subtle smoky undertone that elevates the entire dish.
Layering Like a Pro
Never dump all the ingredients in a single heap. Layering ensures each bite contains a balanced mix of meat, beans, corn, and cheese. I once tried a “everything‑in‑one” method and the texture turned mushy. The disciplined layering is the secret behind that satisfying crunch‑to‑cream contrast.
Creative Twists and Variations
This recipe is a playground. Here are some of my favorite ways to switch things up:
Southwest Veggie Delight
Swap the ground beef for a medley of roasted zucchini, bell peppers, and mushrooms. Add a can of fire‑roasted diced tomatoes for a smoky punch. This version keeps the crunch but delivers a lighter, veggie‑forward profile that even the most meat‑loving guests will enjoy.
Spicy Jalapeño Blast
Stir in two finely diced jalapeños with the meat, and sprinkle a handful of sliced pickled jalapeños on top before baking. The heat builds gradually, giving you a lingering burn that pairs beautifully with the creamy cheese.
Tex‑Mex Breakfast Casserole
Replace the rice with cooked hash browns, add scrambled eggs to the meat mixture, and top with a drizzle of hot sauce. Serve with a side of fresh avocado—breakfast becomes a hearty, indulgent affair.
Cheesy Chipotle Fusion
Incorporate a tablespoon of chipotle in adobo sauce into the salsa‑sour‑cream blend. The smoky, slightly sweet chipotle adds depth that makes the casserole feel restaurant‑quality.
Loaded Taco Supreme
After baking, top each serving with shredded lettuce, diced tomatoes, guacamole, and a squeeze of lime. This adds freshness and a burst of acidity that cuts through the richness.
Storing and Bringing It Back to Life
Fridge Storage
Allow the casserole to cool completely, then cover tightly with foil or a reusable lid. It keeps fresh for up to 4 days. When reheating, sprinkle a few extra tortilla chips on top to restore that initial crunch.
Freezer Friendly
Portion the uncooked casserole into freezer‑safe containers, covering each layer with parchment before sealing. Freeze for up to 2 months. To bake, thaw overnight in the fridge, then follow the original baking instructions—add an extra 5‑10 minutes if frozen.
Best Reheating Method
Preheat the oven to 350°F, add a tiny splash of water (about 2 Tbsp) around the edges, and cover loosely with foil. This creates steam that revives the moisture. After 15 minutes, remove the foil to let the cheese crisp up again. The result is as fresh as day one.