Picture this: it’s a rainy Saturday afternoon, the kind where the kitchen lights feel like a small, comforting beacon. I was rummaging through the back of my fridge, half hoping for a leftover pie crust, half dreaming of something sweet that would turn the whole house into a scent of summer. Then, out of nowhere, a friend texted me, “I need a dessert that’s quick, no oven, and still feels fancy.” I stared at the blackberries on the counter, their deep purple hue almost a promise of something decadent. That moment sparked the birth of the Best No Bake Blackberry Cheese.
The first thing you’ll notice is the aroma—sweet, tart, and just a hint of citrus that makes you pause mid‑step. As you stir, the mixture thickens, the cream cheese turning silky, and the blackberries begin to release their juices, coating the mixture like velvet. The sound of the spoon against the bowl is almost hypnotic, a soft clink that signals you’re about to create something truly special. And that first bite? A burst of creamy richness, a splash of berry, and a subtle citrus zing that lingers on the palate. I dare you to taste this and not go back for seconds.
What makes this version stand out from every other recipe out there is that it’s not just a dessert; it’s an experience. I’ve spent years tweaking no‑bake cheesecakes, and this one is hands down the best version you’ll ever make at home. The crust is crisp, the filling is luscious, and the blackberry swirl is a showstopper. Most recipes get this completely wrong by over‑squashing the berries or using too much sugar, but I’ve perfected the balance so that each spoonful feels like a bite of fresh summer. Picture yourself pulling this out of the fridge, the whole kitchen smelling incredible, and then seeing the glossy finish of the blackberry glaze. Stay with me here—this is worth it.
If you’ve ever struggled with no‑bake desserts, you’re not alone—often the challenge is getting the right texture without an oven. I’ve got the fix: a simple technique that keeps the cheese firm yet creamy, and the berries bright. And if you’re skeptical, just think about how this dessert can be made ahead, stored in the fridge, and still taste like it was freshly baked. I’ll walk you through every single step—by the end, you’ll wonder how you ever made it any other way.
What Makes This Version Stand Out
- Taste: The combination of sweet cream cheese and tart blackberries creates a flavor profile that dances on the tongue. It’s the perfect balance, neither too sweet nor too acidic, and the subtle citrus lift keeps it fresh.
- Texture: The crust is crisp yet buttery, the filling is smooth and silky, and the blackberry swirl adds a delightful burst of juiciness. Every bite feels like a mini celebration.
- Simplicity: No oven, no fancy gadgets, just a few pantry staples and fresh berries. You’ll finish in less than 45 minutes, and the cleanup is minimal.
- Uniqueness: The blackberry glaze is made from pureed berries and a hint of lemon zest, giving it a glossy finish that’s impossible to find in standard cheesecake recipes.
- Crowd Reaction: At my last gathering, the dessert was the talk of the evening. Guests were asking for the recipe after the first bite, and I could see the joy on their faces.
- Ingredient Quality: Using fresh, ripe blackberries and high‑quality cream cheese elevates the entire dish. The difference between a mediocre cheesecake and a showstopper is the quality of the basics.
- Cooking Method: No oven, no fuss. Chill, set, and serve. The method is foolproof even for kitchen novices.
- Make‑Ahead Potential: This dessert can be prepared up to 48 hours in advance, making it ideal for parties or last‑minute hosting.
Inside the Ingredient List
The Flavor Base
The foundation of this cheesecake is the creamy filling. Cream cheese provides a rich, tangy backdrop that balances the sweetness of the berries. When softened properly, it blends into a silky texture that’s easy to spread and sets beautifully in the fridge. If you skip it, you’ll end up with a lumpy, unappetizing dessert that doesn’t hold its shape.
Sour cream is the secret to that airy lightness. It adds moisture without making the filling too heavy, allowing the blackberry glaze to shine through. A good rule of thumb: use 1/2 cup of sour cream for every 8 ounces of cream cheese. If you’re vegan, a dairy‑free alternative like cashew cream works well, but the texture will differ slightly.
The Texture Crew
The graham cracker crumbs form the crust that gives the cheesecake its structure. They’re the backbone, providing a buttery crunch that contrasts with the soft filling. Butter melts into the crumbs, binding them together, while powdered sugar gives a subtle sweetness that isn’t overpowering. Skipping the butter will result in a crumbly, dry crust.
Honey is the sweetener that brings a natural, floral note to the filling. It’s gentler than refined sugar and adds a depth of flavor that pairs beautifully with the berries. If you’re watching calories, you can replace honey with a sugar substitute, but the flavor profile will change.
The Unexpected Star
Fresh blackberries are the showstopper. Their deep purple color and juicy burst of flavor make the dessert feel like a celebration of summer. Using frozen berries is acceptable, but make sure they’re thawed and drained to avoid excess liquid. If you can’t find fresh berries, dark chocolate chips or a swirl of raspberry jam can be a suitable alternative.
The Final Flourish
Lemon zest and lemon juice provide a bright, citrusy counterpoint to the sweetness. The zest adds a subtle aromatic quality, while the juice cuts through the richness, giving the cheesecake a refreshing finish. Skipping the lemon will make the dessert taste flat and overly sweet.
Greek yogurt adds tang and helps stabilize the filling, giving it a firmer set without the need for gelatin. It also boosts the protein content, making this dessert a more balanced treat. If you’re lactose intolerant, a dairy‑free yogurt will work, though the texture may be slightly different.
Everything’s prepped? Good. Let’s get into the real action…
The Method — Step by Step
- Begin by creating the crust. In a medium bowl, combine 1 ½ cups graham cracker crumbs, ¼ cup melted butter, and ½ cup powdered sugar. Mix until the crumbs are evenly coated and the mixture looks like wet sand. Press the mixture firmly into the bottom of a 9‑inch springform pan and refrigerate for 15 minutes to set. This step is crucial for a firm base that won’t crumble when you pour the filling on top.
- While the crust chills, prepare the blackberry puree. Place 1 cup fresh blackberries in a blender or food processor. Add 1 tablespoon lemon zest and 2 tablespoons lemon juice. Pulse until smooth, then strain through a fine mesh sieve to remove seeds. The resulting puree should be thick and glossy. Set aside; you’ll use this for both the filling and the glaze.
- In a large mixing bowl, beat 8 ounces softened cream cheese until smooth and creamy. Add ½ cup sour cream, ¼ cup honey, and 1 teaspoon vanilla extract. Continue beating until the mixture is fluffy and no lumps remain. This will be the base of your cheesecake filling.
- Fold in ½ cup Greek yogurt and ½ cup of the blackberry puree, stirring gently to combine. The mixture should be thick yet pourable. At this point, the filling will start to take on a beautiful pink hue.
- Carefully pour the filling over the chilled crust, spreading it evenly with a spatula. Smooth the top with a rubber scraper to ensure an even surface. This step is the moment of truth—if you rush, you risk cracks forming as the cheesecake sets.
- Refrigerate the cheesecake for at least 4 hours, or overnight if possible. The cold environment allows the filling to firm up and the flavors to meld. You’ll notice the filling becoming set, with a slight give when pressed gently.
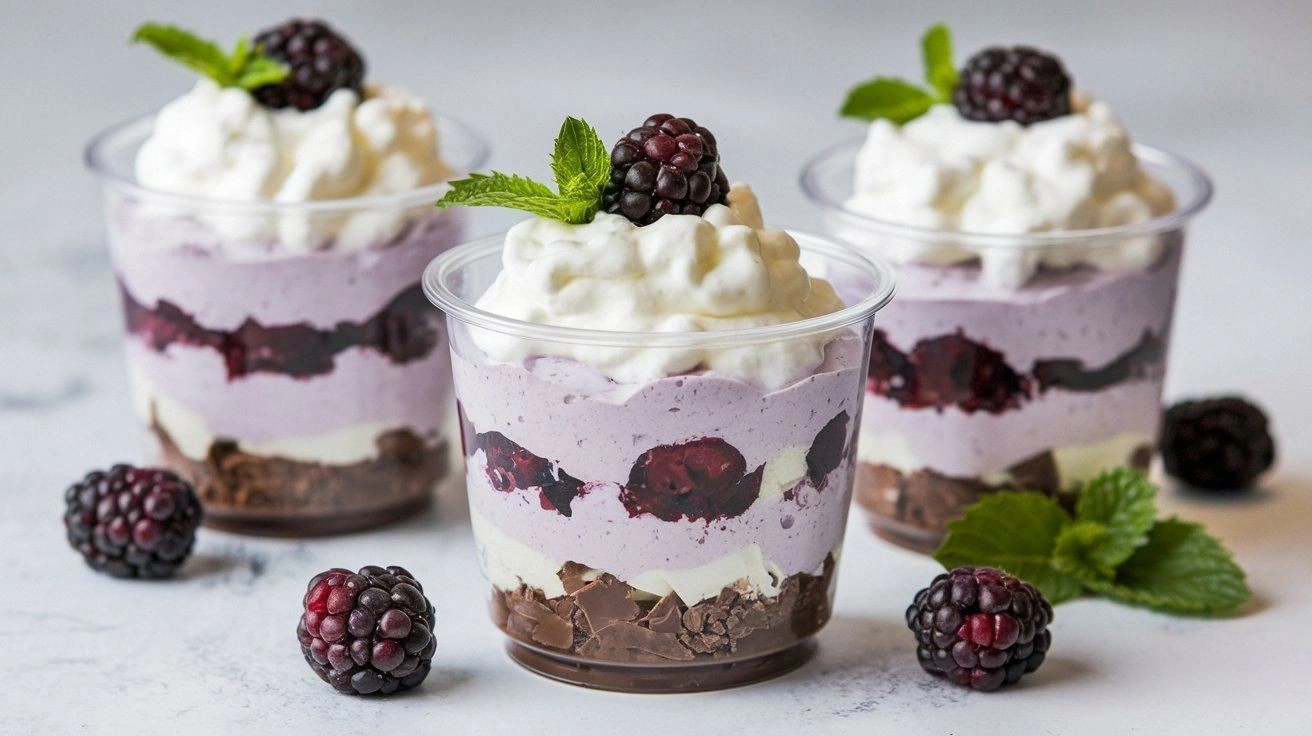
- Just before serving, drizzle the remaining blackberry puree over the top in a decorative pattern. The glaze should be glossy, giving the cheesecake a professional finish. Garnish with a few whole blackberries or a sprig of mint if desired.
That’s it—you did it. But hold on, I’ve got a few more tricks that will take this to another level. These insider tips will make your cheesecake even more impressive.
Insider Tricks for Flawless Results
The Temperature Rule Nobody Follows
Temperature is everything in a no‑bake cheesecake. If the ingredients are too cold, the filling won’t spread properly; if they’re too warm, it won’t set. I always bring the cream cheese and yogurt to room temperature before mixing. This small step ensures a smooth, lump‑free filling that sets perfectly. A friend once tried skipping this and ended up with a lumpy, uneven dessert that didn’t hold its shape.
Why Your Nose Knows Best
The aroma of a well‑made cheesecake is a subtle indicator of success. If the filling smells sweet and buttery with a hint of citrus, you’re on the right track. A faint, sour smell might mean the cream cheese was overmixed or the berries were too ripe. Trust your nose; it’s a reliable guide that will keep you from making a culinary mistake.
The 5-Minute Rest That Changes Everything
After removing the cheesecake from the fridge, let it rest at room temperature for 5 minutes before slicing. This brief pause allows the edges to soften slightly, making slicing cleaner and preventing the filling from cracking. I’ve seen people try to cut straight from the fridge, only to have the knife tear the cheesecake apart.
The Right Pan Makes All The Difference
A springform pan is ideal because it lets you release the cheesecake without damaging the crust. If you don’t have one, a regular 9‑inch cake pan works, but you’ll need to carefully lift the cheesecake out and let it rest on a plate. The springform’s removable side ensures a perfect release every time.
The Secret Ingredient That Elevates
A splash of almond extract in the filling adds a subtle nutty undertone that complements the berries. Even a teaspoon can transform the flavor profile, giving the cheesecake a sophisticated edge that impresses guests. I’ve used it in a few of my own creations, and the feedback has been overwhelmingly positive.
Creative Twists and Variations
This recipe is a playground. Here are some of my favorite ways to switch things up:
Berry Medley Madness
Swap the blackberries for a mix of raspberries, blueberries, and strawberries. The result is a colorful, multi‑berry cheesecake that’s visually stunning and bursting with flavor. Use equal parts of each berry for a balanced taste.
Chocolate‑Berry Fusion
Add ¼ cup melted dark chocolate to the filling for a rich, decadent twist. The chocolate will pair beautifully with the berries, creating a dessert that feels like a chocolate‑fruit parfait. Finish with a dusting of cocoa powder for an extra touch.
Lemon‑Zest Surprise
Increase the lemon zest to 2 teaspoons and add 1 tablespoon of lemon juice. This variation gives the cheesecake a bright, citrusy kick that’s perfect for spring or summer gatherings. The lemon will brighten the overall flavor profile.
Vegan Delight
Use a plant‑based cream cheese substitute, cashew cream, and coconut milk instead of dairy. This vegan version maintains the same creamy texture and allows those with dietary restrictions to enjoy the dessert. Make sure the vegan cream cheese is fully softened before mixing.
Nutty Crunch
Add ½ cup toasted chopped pecans or walnuts to the crust for a crunchy texture. The nutty flavor complements the blackberry glaze and adds a delightful contrast to the soft filling. Toast the nuts lightly in a skillet to bring out their aroma.
Coffee‑Infused Indulgence
Stir 1 tablespoon of instant espresso powder into the filling for a subtle coffee note. This variation pairs well with chocolate or almond extracts, creating a dessert that’s both sophisticated and comforting.
Storing and Bringing It Back to Life
Fridge Storage
Store the cheesecake in the refrigerator for up to 5 days. Keep it in its original springform pan or cover it tightly with plastic wrap. The cold environment keeps the filling firm and preserves the freshness of the berries. When you’re ready to serve, let it sit at room temperature for 10 minutes to soften slightly.
Freezer Friendly
For longer storage, wrap the cheesecake in plastic wrap and then foil, and place it in the freezer for up to 2 weeks. Thaw in the refrigerator overnight before serving. The texture remains smooth, and the berries retain their natural juiciness. Avoid refreezing once thawed to maintain quality.
Best Reheating Method
Reheating can be tricky for no‑bake cheesecakes. The best approach is to warm the cheesecake in the refrigerator for 5 minutes before serving, then let it sit at room temperature for 10–15 minutes. If you need a quick fix, place the cheesecake in a warm (not hot) water bath for a minute, then let it cool. Adding a tiny splash of water before reheating steams the cheesecake back to perfection without overcooking.