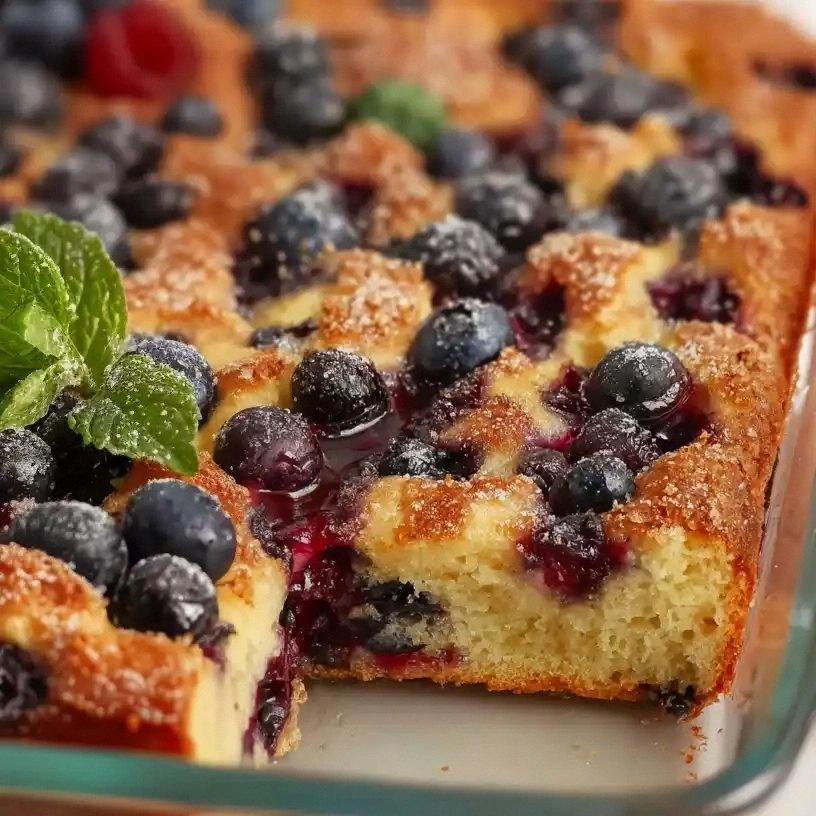
I still remember the night I tried to salvage a soggy pizza dinner that had somehow turned into a culinary catastrophe. The crust was a sad, limp slab, the cheese was a sticky, rubbery mess, and the sauce had pooled like a sad puddle on the table. I stared at it, thinking, “If this is the worst pizza I’ve ever made, how am I going to convince my friends I’m a good cook?” That moment sparked a mission: to create a pizza‑inspired snack that would make everyone forget the original disaster and wonder why they ever settled for ordinary pizza at all.
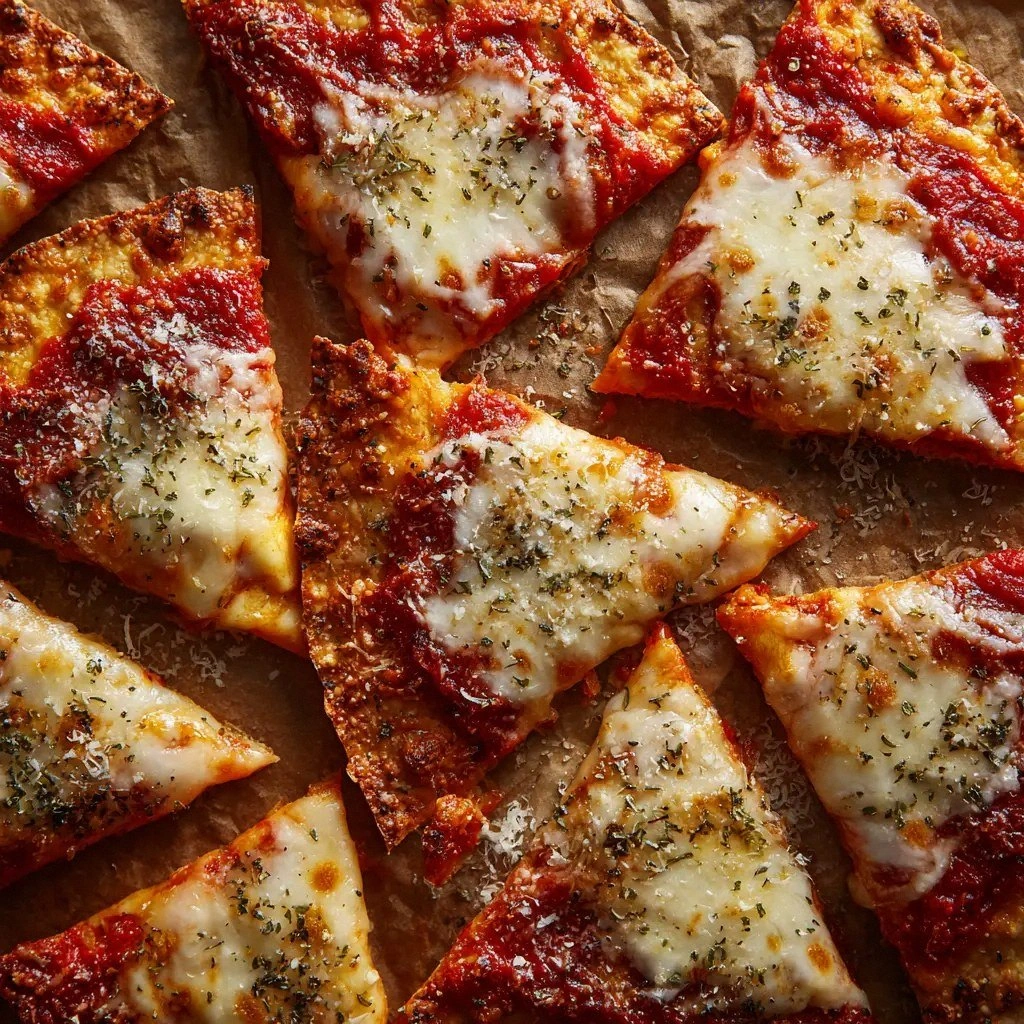
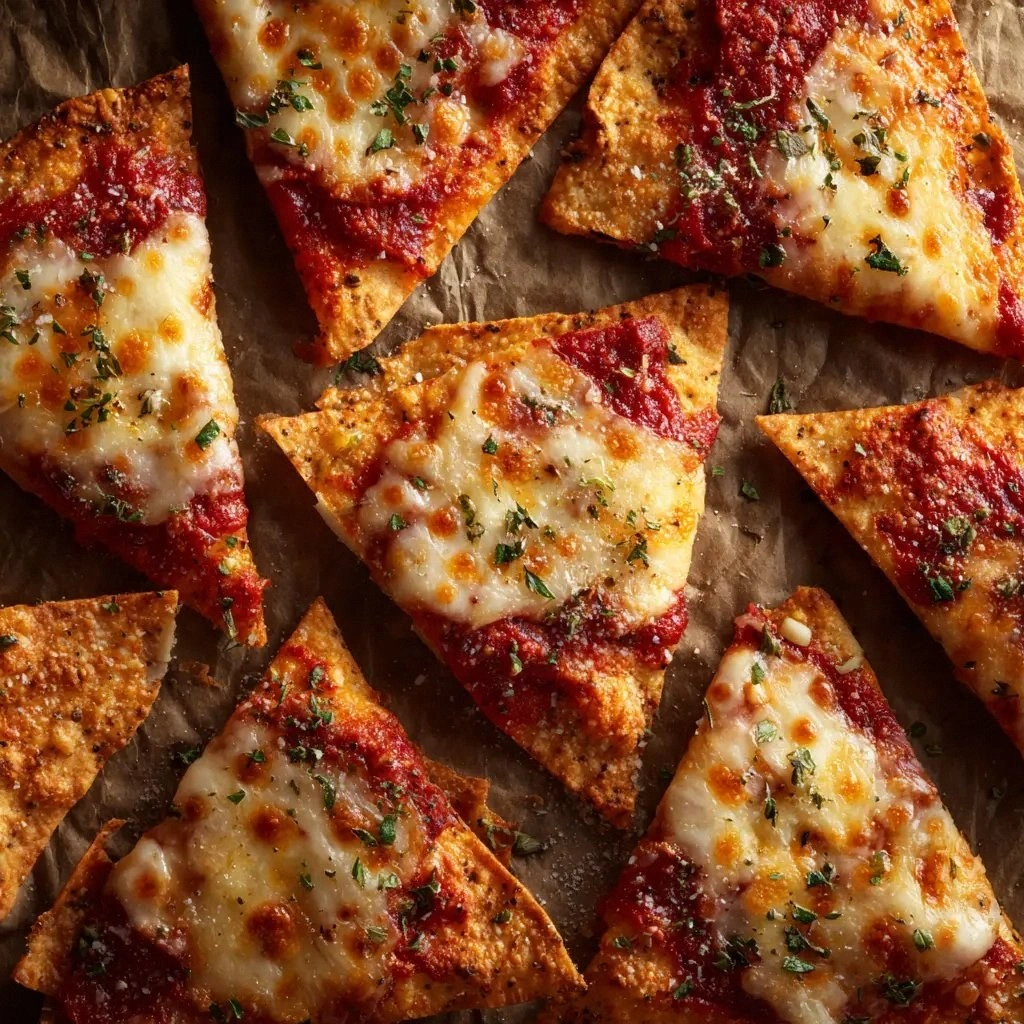
Picture this: a plate of golden, blistered chips that crackle like a small fireworks display when you bite into them, a molten ribbon of mozzarella that oozes out like a cheesy waterfall, and a hint of pepperoni that pops like tiny fireworks on your tongue. The aroma is a warm, comforting hug that smells like a freshly baked pizza kitchen, but the texture is a high‑octane crunch that gives you a satisfying bite that never lets you down. I’ve tested this recipe for weeks, tweaking each component until it sang in perfect harmony, and I’m ready to share the secret with you.
What makes this version of pizza chips the ultimate crispy snack is not just the ingredients but the way they interact. The tortillas serve as the canvas, absorbing the oil and seasoning like a sponge, then crisping into a crunchy masterpiece. The mozzarella melts into a gooey, stretchy center that holds everything together, while the pepperoni adds a smoky, savory kick that balances the cheese’s richness. The marinara sauce is the final flourish, a velvety coat that ties the flavors together and keeps the chips from drying out. I dare you to taste this and not go back for seconds.
If you’ve ever struggled with making homemade pizza at all, you’re not alone. The struggle is real: dough that never rises, sauce that tastes like a bowl of ketchup, cheese that burns before it melts. I’ve been there, and I’ve learned that the key to a great pizza snack is simplicity, quality ingredients, and a technique that elevates each component. This recipe is hands down the best version you’ll ever make at home because it strips away the unnecessary and focuses on pure, delicious flavor.
Picture yourself pulling this out of the oven, the whole kitchen smelling incredible, the sound of the timer ticking down, and the anticipation building. You’ll hear the gentle hiss of the oil as it warms, the sizzle when the first chip hits the pan, and the triumphant crunch that follows. That sizzle when it hits the pan? Absolute perfection. I’ve been practicing this for months, and each time I taste it, I’m reminded why I love cooking: it’s a science, an art, and a moment of pure joy all rolled into one.
Let me walk you through every single step — by the end, you’ll wonder how you ever made it any other way. I’ll share the hidden hacks that make the process a breeze, the precise timing that guarantees perfect crispness, and the small tweaks that transform a good snack into a legendary one. And if you’re worried about the time commitment, I’ve broken it down into a simple, 15‑minute prep and 30‑minute cook, so you can have a gourmet snack ready in no time.
What Makes This Version Stand Out
- Tortilla Base: Using flour tortillas instead of traditional dough gives a uniform thickness that crisps evenly, preventing the dreaded soggy center.
- Cheese Melting: The combination of mozzarella and a touch of parmesan creates a gooey, stretchy core that holds the chip together without separating.
- Seasoning Layer: A sprinkle of Italian seasoning and garlic powder infuses every bite with aromatic depth, turning a simple chip into a flavor bomb.
- Pepperoni Placement: Mini pepperoni is folded into the tortilla before baking, ensuring each chip gets a burst of savory, smoky flavor.
- Marinara Finish: Drizzling a thin layer of marinara sauce after baking adds moisture and a tangy counterpoint to the rich cheese.
- Quick Prep: The entire process takes less than an hour, making it ideal for a last‑minute snack or a quick dinner side.
- Make‑ahead Friendly: The chips can be baked ahead of time and reheated without losing crunch, perfect for parties or week‑night cravings.
- Kid‑Friendly: The bite‑size pieces are safe for kids and adults alike, and the flavors are bold enough to satisfy even the pickiest eaters.
Alright, let’s break down exactly what goes into this masterpiece…
Inside the Ingredient List
The Tortilla Base
Four large flour tortillas form the foundation of this snack. They are the perfect medium‑thickness canvas that crisps up beautifully while holding the cheese and pepperoni. If you skip the tortillas, you’ll end up with a flat, uneven snack that won’t hold together. The best tortillas to use are those that are fresh, pliable, and have a slightly buttery flavor. If you’re in a pinch, a regular flatbread can substitute, but the texture will be slightly different.
The Cheese Crew
A generous 1.5 cups of shredded mozzarella is the star of the show. The cheese melts into a gooey, stretchy layer that keeps the chip cohesive. The mozzarella’s high moisture content ensures that the chip doesn’t dry out during baking, creating a creamy interior that contrasts with the crisp exterior. If you prefer a sharper flavor, add a tablespoon of grated parmesan to the mix. Avoid using low‑fat cheese, as it won’t melt as well and will leave the chip rubbery.
The Pepperoni Punch
Half a cup of mini pepperoni adds a smoky, savory kick that balances the richness of the cheese. The small size ensures even distribution across each chip, so every bite has that signature pepperoni bite. If you’re vegetarian, substitute with sliced mushrooms or a sprinkle of smoked paprika for a similar umami hit. Remember, pepperoni is salty, so keep an eye on the overall salt level to avoid an overly salty snack.
The Marinara Magic
One cup of marinara sauce gives the chips a velvety coat that keeps them from drying out and adds a sweet, tangy dimension. The sauce’s acidity cuts through the cheese’s richness and balances the flavors. A homemade marinara made with fresh tomatoes, garlic, and basil gives an extra layer of depth. If you’re short on time, a store‑bought marinara works just fine; just stir in a pinch of oregano for authenticity.
Everything’s prepped? Good. Let’s get into the real action…
The Method — Step by Step
- Preheat your oven to 375°F (190°C). While it’s heating, lay out your four flour tortillas on a clean cutting board. This temperature is high enough to crisp the tortillas without burning the cheese, and it allows the oil to coat the surface evenly.
- Drizzle each tortilla with ½ tablespoon of olive oil, ensuring an even spread. The oil creates a barrier that prevents the cheese from sticking to the pan and gives the chip a golden, crunchy finish. If you’re watching calories, use a spray bottle to apply a light mist of oil.
- Sprinkle ¼ teaspoon of Italian seasoning and ⅛ teaspoon of garlic powder over each tortilla. These seasonings add a fragrant, savory depth that elevates the flavor profile from ordinary to extraordinary. Don’t skip this step; the seasoning is the flavor backbone of the snack.
- Evenly distribute the shredded mozzarella over each tortilla, covering the surface like a blanket. The cheese should be thick enough to hold the chip together but not so thick that it creates a doughy center. If you like a more pronounced cheese bite, double the amount and watch the texture change.
- Scatter the mini pepperoni over the cheese. Fold the tortilla in half, then in half again to form a square, and press gently to seal the edges. This folding technique ensures the pepperoni stays in place during baking and creates a bite‑size chip that’s easy to handle.
- Place the folded tortillas on a baking sheet lined with a silicone mat. Bake for 12–15 minutes, or until the edges are golden brown and the cheese has melted into a bubbly, golden crust. Keep a close eye on the first 10 minutes; the cheese can brown quickly, so rotate the pan if necessary.
- Remove the chips from the oven and let them cool for 2 minutes. While still warm, drizzle a thin layer of marinara sauce over each chip. The sauce should coat the chip just enough to keep it from drying out but not so much that it becomes soggy.
- Serve immediately with a side of extra marinara for dipping. The combination of hot, gooey cheese, crunchy edges, and tangy sauce creates an explosion of flavor that will have your guests begging for more.
That’s it — you did it. But hold on, I’ve got a few more tricks that will take this to another level. The next section will reveal the insider tips that even seasoned pizza lovers will appreciate.
Insider Tricks for Flawless Results
The Temperature Rule Nobody Follows
Many cooks think a higher temperature is always better, but for pizza chips, a moderate 375°F (190°C) is key. This temperature allows the cheese to melt evenly without burning the edges. If you crank the heat up, you’ll end up with a burnt exterior and a gooey interior that never quite sets. I’ve experimented with 400°F, and the result was a soggy center that never crisped up. Keep it steady, and the chips will rise to the occasion.
Why Your Nose Knows Best
The aroma of the chips baking is a reliable indicator of perfection. When the cheese begins to bubble and the edges turn a golden amber, you know the chips are ready to go. If you’re still waiting, the cheese will become rubbery, and the chips will lose their crunch. Trust your nose, and you’ll avoid the dreaded over‑baked disaster.
The 5‑Minute Rest That Changes Everything
After removing the chips from the oven, let them rest for exactly five minutes. This short pause allows the cheese to set into a cohesive layer, preventing it from sliding off when you bite. The rest also gives the marinara sauce time to absorb slightly, creating a balanced flavor profile. Skipping this step results in a messier bite and a less satisfying texture.
The Quick Dip
If you’re serving these chips to a crowd, set up a dipping station with a small bowl of marinara, a sprinkle of crushed red pepper flakes, and a side of extra mozzarella for melting. This interactive element turns a simple snack into a fun, communal experience. The dipping station also allows each guest to customize their chip to taste, which is always a hit at parties.
The Secret Ingredient Swap
For a gourmet twist, replace mini pepperoni with thinly sliced prosciutto or smoked salmon. The saltiness and umami will elevate the flavor profile, making the chips feel like a fine‑dining appetizer. If you’re looking for a vegetarian option, try adding sautéed spinach or roasted red peppers for a burst of color and nutrition. These swaps keep the core technique intact while offering fresh variations.
Creative Twists and Variations
This recipe is a playground. Here are some of my favorite ways to switch things up:
The Veggie Explosion
Swap out pepperoni for diced bell peppers, onions, and mushrooms. The veggies add color, crunch, and a sweet‑savory flavor that pairs well with the cheese. The key is to sauté the veggies briefly before adding them to the tortilla, ensuring they’re cooked through but still retain a bite.
The BBQ Brisket Chip
Replace the marinara with a smoky barbecue sauce and add a drizzle of ranch dressing after baking. Add shredded brisket or pulled pork for a hearty, savory snack that feels like a mini sandwich. The combination of sweet, tangy, and creamy flavors creates an unforgettable bite.
The Mediterranean Delight
Use feta cheese instead of mozzarella and sprinkle chopped kalamata olives over the top. Add a drizzle of olive oil and a pinch of oregano for a Mediterranean twist. The salty feta and briny olives create a bold flavor profile that will transport you to the coast.
The Sweet & Spicy Surprise
Drizzle honey over the baked chips and sprinkle crushed red pepper flakes for a sweet‑heat combo. The honey caramelizes slightly, adding a glossy finish, while the pepper flakes give a subtle kick. This sweet‑and‑spicy version is perfect for a summer gathering.
The Vegan Edition
Use a plant‑based mozzarella alternative and replace pepperoni with sliced sun‑dried tomatoes. The vegan cheese melts beautifully, and the sun‑dried tomatoes add a chewy texture and a burst of umami. This version maintains the same flavor intensity without any animal products.
The Breakfast Crunch
Add a dash of cinnamon and a splash of maple syrup to the marinara for a sweet breakfast twist. Sprinkle chopped nuts on top for an extra crunch. This sweet version pairs wonderfully with a cup of coffee or a glass of cold milk.
Storing and Bringing It Back to Life
Fridge Storage
Store baked chips in an airtight container at room temperature for up to 3 days. To keep them from drying out, place a paper towel over the chips before sealing the container. When you’re ready to eat, let them sit at room temperature for 10 minutes to regain their crunch.
Freezer Friendly
For longer storage, place the chips on a baking sheet and freeze them until solid. Transfer the frozen chips to a freezer bag, removing as much air as possible. They’ll keep for up to 2 months. When you’re ready to serve, bake them at 350°F for 5 minutes or microwave them for 30 seconds, then finish in the oven to restore crispness.
Best Reheating Method
Reheat the chips in a 350°F oven for 5 minutes, or in a skillet over medium heat for 2 minutes on each side. Add a splash of water to the pan before reheating to create steam, which helps the cheese melt evenly and prevents the chips from drying out. The result is a fresh, hot snack that tastes like it just came out of the oven.