It started on a rainy Saturday when I was rummaging through the pantry for a quick dessert to serve at a surprise gathering. I opened the last box of brownie mix, half‑heartedly hoping the familiar chocolatey promise would satisfy my craving for something sweet and spooky. Instead, the mixture turned into an accidental canvas for a Halloween treat that would soon become my signature bite. I was skeptical at first—brownie mix usually yields flat, cookie‑like squares, not the glossy, bite‑size monsters I imagined.
I whisked the batter, added a splash of vegetable oil, and folded in chocolate chips, watching the glossy mixture swirl like a midnight pond. The aroma that filled the kitchen was a deep, rich chocolate that seemed to melt the rain outside into a sweet drizzle. When I dropped spoonfuls onto the pan, the batter popped with a faint hiss, and the edges browned to a golden‑brown perfection, almost like tiny moons. I stared at the sizzling surface, feeling the heat pulse through the countertop, and realized that this was a recipe that would change the way I think about brownies.
What makes this version stand out is not just the texture or the flavor, but the way it transforms the ordinary into the extraordinary. By combining a boxed mix with a few strategic tweaks—oil, water, chocolate chips, and candy eyes—I achieved a bite that is fudgy, chewy, and irresistibly spooky. I dare you to taste this and not go back for seconds. The first bite melts, the second crackles, and the third leaves you craving the next. If you’ve ever struggled to make brownies that aren’t either too dry or too gooey, you’re not alone—this recipe fixes that dilemma.
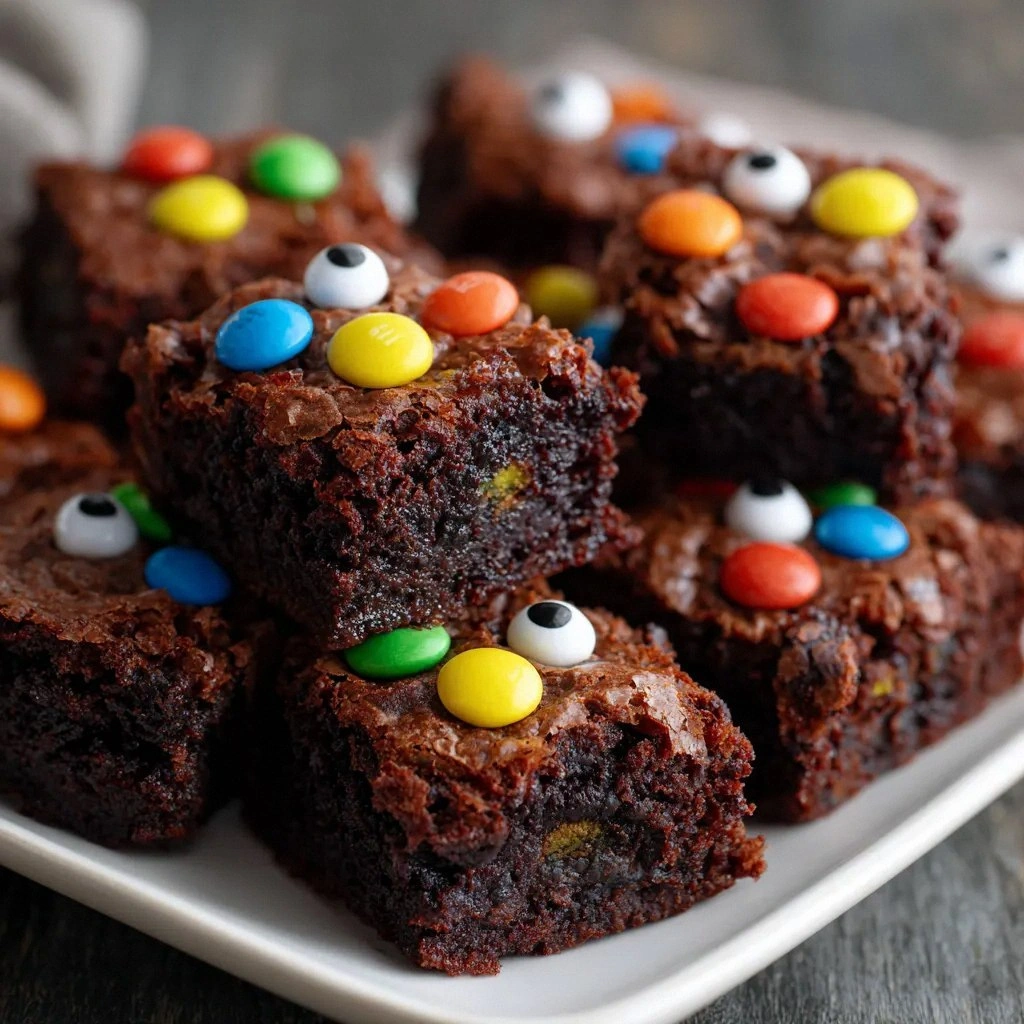
Picture yourself pulling these Monster Eye Brownie Bites out of the oven, the kitchen smelling like a chocolate forest after a storm. The surface glistens under the kitchen lights, the candy eyes stare back at you like mischievous ghosts. I’ve spent hours tweaking the ratios, and the result is hands down the best version you’ll ever make at home. The batter is thick enough to hold the eyes, yet silky enough to bite through. Stay with me here—this is worth it.
What Makes This Version Stand Out
- Flavor: The brownie mix delivers a deep chocolate core, while the chocolate chips create pockets of molten goo that explode with every bite. The subtle sweetness from the frosting, if used, balances the richness without overpowering the chocolate.
- Texture: The addition of vegetable oil and a splash of water creates a fudgy center and a crisp edge that shatters like thin ice when you bite. The batter stays moist even after cooling, making each bite a perfect bite‑size experience.
- Visual Appeal: Candy eyes are the star of the show, giving the bites an unmistakable spooky look that makes them perfect for Halloween parties or any themed gathering.
- Ease: Using a boxed mix eliminates the need for measuring flour, sugar, and cocoa separately. All you need is a whisk, a pan, and a handful of chocolate chips.
- Make‑ahead Potential: These bites freeze well and can be reheated in the oven or microwave, making them ideal for parties or last‑minute dessert needs.
- Audience Impact: Kids and adults alike fall in love with the playful eyes, making it a crowd‑pleaser at family gatherings or office parties.
Alright, let's break down exactly what goes into this masterpiece…
Inside the Ingredient List
The Flavor Base
Brownie mix is the backbone of this recipe, providing the chocolate foundation that makes each bite a bite of pure bliss. It contains cocoa, sugar, and leavening agents that work together to create a fudgy interior. If you skip the mix and try to build everything from scratch, you’ll end up spending hours measuring flour, sugar, and cocoa, and the end result may be uneven. For the best flavor, choose a mix that has a higher cocoa content; it gives a richer chocolate taste that pairs beautifully with the chocolate chips.
The Texture Crew
Large eggs bind the batter, giving the brownies a tender crumb while ensuring they hold together when you bite into them. Vegetable oil adds moisture and richness, preventing the bites from drying out. Water activates the mix and helps create a smooth batter that spreads evenly in the pan. If you omit the eggs, the texture will be crumbly, and the bites will fall apart. A quick swap: use 1 cup of buttermilk instead of water for a tangy twist.
The Unexpected Star
Chocolate chips are the secret weapon that turns plain brownies into an explosion of chocolate. They melt into molten pockets that burst with flavor. If you prefer a lighter version, substitute half the chips with white chocolate for a sweet contrast. Remember, the chips must be added after the batter is mixed; otherwise, they will sink to the bottom and lose their gooey effect.
The Final Flourish
Candy eyes are the playful finishing touch that transforms the brownies into monster‑like treats. They add a pop of color and a fun element for kids. Frosting is optional but recommended if you want an extra layer of sweetness. A swirl of vanilla or chocolate frosting on top adds a glossy finish and a creamy counterpoint to the fudgy brownie base. If you’re watching calories, skip the frosting or use a light whipped cream instead.
Everything's prepped? Good. Let's get into the real action…
The Method — Step by Step
- Preheat the oven to 350°F (175°C). While the oven is heating, line a 9x13 inch baking pan with parchment paper or lightly grease it. This step ensures easy release and a clean finish. The temperature is critical; too high and the edges will burn before the center sets.
- Combine the brownie mix and water. Pour the entire box of brownie mix into a large bowl, then add 1/4 cup of water. Stir until the batter is smooth and free of lumps. If the batter feels too thick, add a tablespoon of milk or water until it reaches a thick‑but‑pourable consistency. This will help the batter spread evenly in the pan.
- Whisk in the eggs and oil. Beat two large eggs into the mixture, then pour in 1/4 cup of vegetable oil. The oil keeps the brownies moist and gives them a glossy sheen. Whisk until the batter is glossy and homogenous, ensuring the eggs are fully incorporated.
- Fold in chocolate chips. Gently stir in one cup of chocolate chips, reserving a few for topping. The chips should be evenly distributed to create those coveted pockets of molten chocolate. If you prefer a less chocolatey bite, reduce the chips to half a cup.
- Pour the batter into the pan. Transfer the batter to the prepared pan, spreading it with a spatula so it covers the surface evenly. The batter should be about 1/2 inch thick. This thickness ensures a chewy interior while maintaining a crisp edge.
- Bake for 20 minutes. Place the pan in the oven and bake until the edges start pulling away from the pan and the center is set but still slightly jiggly. The batter should smell toasty, and a toothpick inserted near the center should come out with a few moist crumbs. This is the moment of truth; don’t rush it.
- Cool before cutting. Let the brownies cool in the pan on a wire rack for at least 15 minutes. Cutting them too early will cause them to crumble. While they’re cooling, the chocolate chips will firm up, creating a perfect bite‑size texture.
- Cut into bite‑size squares. Using a sharp knife, cut the cooled brownie sheet into 12 equal squares. A ruler helps keep the pieces uniform. Uniformity ensures even baking and consistent flavor in every bite.
- Decorate with candy eyes. Carefully place a candy eye on each brownie square, pressing lightly to ensure it sticks. The candy eyes give the brownies a playful, monster vibe that’s sure to delight kids and adults alike.
- Add frosting, if desired. If you opted for frosting, spread a thin layer of vanilla or chocolate frosting over the top of each bite. This optional step adds a creamy contrast to the fudgy brownie. Use a small offset spatula for an even coat.
That's it — you did it. But hold on, I've got a few more tricks that'll take this to another level…
Insider Tricks for Flawless Results
The Temperature Rule Nobody Follows
Many bakers bake brownies at 375°F, thinking higher heat means faster results. In reality, a steady 350°F ensures the edges set while the center stays moist. If you’re using a convection oven, lower the temperature by 25°F to avoid over‑browning. This simple adjustment keeps the brownies chewy and prevents the candy eyes from melting.
Why Your Nose Knows Best
The smell of baking brownies is a reliable indicator of doneness. When the aroma shifts from sweet to a slightly nutty, toasty scent, the brownies are ready. Trust your nose; it’s a more accurate gauge than a timer. I’ve learned that the moment the center stops releasing steam is the perfect time to pull them out.
The 5‑Minute Rest That Changes Everything
After removing the brownies from the oven, let them rest for exactly five minutes before cutting. This pause allows the batter to set, preventing the squares from falling apart. During this brief rest, the chocolate chips firm up, ensuring each bite holds its shape.
The Secret to Perfect Candy Eyes
Candy eyes can be tricky to place. Use tweezers or a small spoon to pick them up, ensuring you don’t break them. Place them on the brownie while it’s still slightly warm; the heat helps them adhere better. If you’re making a large batch, consider pre‑arranging the eyes on a sheet to save time.
The Quick Frosting Fix
If you forget frosting, whip a quick glaze by mixing powdered sugar with a splash of milk or vanilla extract. Drizzle the glaze over the cooled bites for a glossy finish. This step adds a touch of sweetness and a polished look without the extra calories of traditional frosting.
The Clean‑Up Shortcut
Instead of scrubbing the pan after each bake, line it with parchment paper and simply lift it out after cooling. This saves time and keeps your kitchen surfaces clean. I’ve found that this method reduces kitchen stress, especially when hosting a party.
Creative Twists and Variations
This recipe is a playground. Here are some of my favorite ways to switch things up:
Nutty Monster
Add 1/2 cup of chopped walnuts or pecans to the batter before baking. The nuts add a crunchy contrast to the chewy brownie. They also introduce a subtle earthy flavor that complements the chocolate.
Salted Caramel Surprise
Swirl a few tablespoons of salted caramel sauce into the batter after it’s baked. The caramel adds a sweet‑savory dimension, and the salt enhances the chocolate flavor. This version is perfect for a sophisticated dessert spread.
Minty Monster
Add 1 teaspoon of peppermint extract to the batter. The mint gives a refreshing kick that pairs wonderfully with chocolate. Sprinkle crushed peppermint candies on top for an extra burst.
Vegan Edition
Replace the eggs with 1/4 cup of unsweetened applesauce and use a dairy‑free brownie mix. The applesauce keeps the batter moist, while the mix ensures the flavor stays chocolatey. This version is dairy‑free and still delivers that fudgy texture.
Cheese‑Covered Monster
After baking, top each bite with a small slice of cream cheese or mascarpone. The creamy layer creates a decadent contrast to the chocolate. Dust with cocoa powder for an elegant finish.
Spicy Twist
Add 1/2 teaspoon of cayenne pepper to the batter for a subtle heat that pairs surprisingly well with chocolate. The pepper adds depth without overwhelming the sweetness. This version is great for adventurous palates.
Storing and Bringing It Back to Life
Fridge Storage
Place the baked bites in an airtight container and store them in the refrigerator for up to five days. The cold environment preserves the fudgy texture and prevents the chocolate chips from melting. When you’re ready to serve, let them sit at room temperature for 10 minutes to soften slightly.
Freezer Friendly
Wrap each bite individually in parchment paper, then place them in a freezer bag. Freeze for up to two months. When you want to enjoy them, pop out a bite and let it thaw for 15 minutes. This method keeps the chocolate chips intact and the texture fresh.
Best Reheating Method
To revive frozen or chilled bites, preheat the oven to 300°F (150°C). Place the bites on a parchment‑lined tray and bake for 5–7 minutes. A tiny splash of water on the tray before baking steams the surface, keeping the brownies moist and preventing them from drying out.