I once tried to impress a group of friends with a “quick” pizza night, only to end up with a crust that could double as a cardboard shoe sole. The kitchen smelled like burnt ambition, the sauce pooled in the middle like a sad lake, and I swear someone whispered, “Next time, just order.” That disaster sparked a midnight research binge that led me down the rabbit hole of whole‑wheat dough science. I discovered that the secret isn’t more flour or a fancy stone‑baked oven; it’s a simple balance of hydration, gentle yeast activation, and a dash of patience that turns humble whole‑wheat into a cloud‑like canvas for toppings.
Picture this: a golden‑brown crust that cracks just enough to reveal a tender, slightly nutty interior, the kind of bite that makes you pause and say, “Whoa, is this really whole wheat?” The aroma of olive oil and toasted grain fills the kitchen, the sound of the dough stretching like a lazy cat, and the heat of the oven hugging the pizza like a warm blanket. Every sense is on high alert, and the anticipation builds as you watch the dough puff and brown. I dare you to taste this and not go back for seconds; the texture is so satisfying it practically sings.
What makes this version truly stand out is a tiny, unexpected ingredient: a teaspoon of honey. That little splash of sweetness feeds the yeast, accelerates the rise, and adds a subtle caramel note that you’ll never guess is there. Most recipes get this completely wrong, either skipping the sweetener entirely or drowning the dough in sugar, which makes the crust cloying. Here, the honey is the silent hero that gives the crust a whisper of depth without ever stealing the spotlight.
Okay, ready for the game‑changer? I’m going to walk you through every single step — by the end, you’ll wonder how you ever made pizza dough any other way. From the moment you whisk the yeast into warm water to the instant the crust emerges from the oven, I’ll be right there beside you, offering a witty comment, a kitchen hack, and a reminder to trust your nose. This next part? Pure magic.
What Makes This Version Stand Out
- Flavor Depth: The honey and olive oil create a subtle sweetness and richness that elevate the whole‑wheat’s natural nuttiness.
- Texture Balance: A 65% hydration level yields a dough that’s soft enough to stretch but sturdy enough to hold toppings without sagging.
- Simplicity: Only seven pantry staples are needed, and none of them require exotic sourcing.
- Uniqueness: Whole‑wheat usually feels heavy; this recipe lightens it up with a splash of all‑purpose flour for a perfect crumb.
- Crowd Reaction: Guests often ask, “Is this whole wheat?” and then immediately ask for seconds.
- Ingredient Quality: Using a high‑protein whole‑wheat flour ensures gluten development without sacrificing flavor.
- Cooking Method: A hot oven (500°F) with a pre‑heated pizza stone creates that coveted leopard‑spot blister.
- Make‑Ahead Potential: The dough can be refrigerated for up to three days or frozen for a month, giving you pizza on demand.
Inside the Ingredient List
The Flavor Base
Whole wheat flour is the heart of this dough, delivering a nutty, earthy flavor that ordinary white flour simply can’t match. It also packs more fiber, which gives the dough a slightly denser crumb that holds up beautifully under heavy toppings. If you skip it, you’ll lose that wholesome character and end up with a bland, cookie‑like crust. For the best results, choose a stone‑ground whole wheat flour with at least 12% protein; it creates enough gluten to stretch without tearing.
Olive oil does more than keep the dough from sticking to the bowl. It coats the gluten strands, making the final crust tender on the inside while staying crisp on the outside. A high‑quality extra‑virgin olive oil adds a fruity note that pairs perfectly with the honey’s subtle caramel. If you’re out of olive oil, canola works, but you’ll miss that signature aroma.
The Texture Crew
All‑purpose flour is the secret sidekick that lightens the whole‑wheat’s heft. By blending 25% all‑purpose with the whole wheat, you retain the nutty flavor while achieving a softer crumb that’s easier to stretch. Skipping this step results in a dough that feels like you’re chewing on a piece of whole‑grain toast. If you’re gluten‑intolerant, you can swap the all‑purpose for a gluten‑free blend, but expect a denser texture.
Active dry yeast is the living engine that inflates the dough. It feeds on the sugars in the honey and flour, producing carbon dioxide bubbles that give the crust its airy lift. Using fresh yeast can give a slightly sweeter profile, but active dry is more convenient and reliable for home bakers. Always proof the yeast in warm water; if the water is too hot, you’ll kill the microbes, and if it’s too cold, the rise will stall.
The Unexpected Star
Honey isn’t just a sweetener; it’s a natural humectant that locks moisture into the dough, preventing it from drying out during the long rise. A teaspoon is enough to feed the yeast without making the crust sugary. If you’re allergic or vegan, agave nectar or maple syrup work just as well, though the flavor will shift slightly toward maple’s caramel notes.
The Final Flourish
Salt is the unsung hero that regulates yeast activity and strengthens the gluten network, resulting in a crust that snaps rather than folds. A teaspoon is perfect; more than that will make the dough too tight, while less will leave it flavorless. Finally, warm water at 110°F (43°C) is the ideal temperature to awaken the yeast without shocking it. If you don’t have a thermometer, the water should feel like a comfortable bath—warm but not scalding.
Everything's prepped? Good. Let’s get into the real action…
The Method — Step by Step
- Proof the yeast. In a medium bowl, combine 3/4 cup warm water, 1 tsp active dry yeast, and 1 tsp honey. Stir gently and let sit for 5‑7 minutes until the mixture becomes foamy and smells like sweet perfume. This is the moment of truth; if nothing bubbles, your yeast is dead and you’ll need a fresh packet. Kitchen Hack: Add a pinch of sugar to the water to give the yeast an extra boost if your kitchen is cool.
- Mix dry ingredients. In a large mixing bowl, whisk together 2 cups whole wheat flour, 1 cup all‑purpose flour, 1 tsp salt, and a pinch of extra‑virgin olive oil. The oil coats the flour particles, preventing clumping later on. This step is crucial because uniform distribution of salt ensures the yeast doesn’t get shocked in any one spot.
- Combine wet and dry. Make a well in the center of the dry mixture and pour in the foamy yeast mixture. Stir with a wooden spoon until a shaggy dough forms. It will look a bit sticky—that’s a good sign of proper hydration. At this point, the dough should feel like a wet lump that clings slightly to your fingers.
- Knead until smooth. Transfer the dough onto a lightly floured surface and knead for 8‑10 minutes. You’re looking for a smooth, elastic texture that springs back when pressed. If the dough tears, let it rest for 2 minutes and continue; the gluten will relax. The kitchen should be filled with a faint, nutty aroma that tells you the gluten is developing nicely.
- First rise. Lightly oil a clean bowl, place the dough inside, and cover with a damp towel. Let it rise in a warm spot for 1‑1.5 hours, or until doubled in size. You’ll notice the dough puffing up like a balloon, and the surface will become slightly glossy. Watch Out: If your kitchen is too cold, the rise can take up to 2 hours; don’t panic, just be patient.
- Punch down and fold. Gently punch the dough to release excess gas, then fold it onto itself three times, creating a neat rectangular shape. This step builds layers of gluten that will translate into a light, airy crumb. Let the dough rest for 10 minutes; this short rest makes it easier to stretch without springing back.
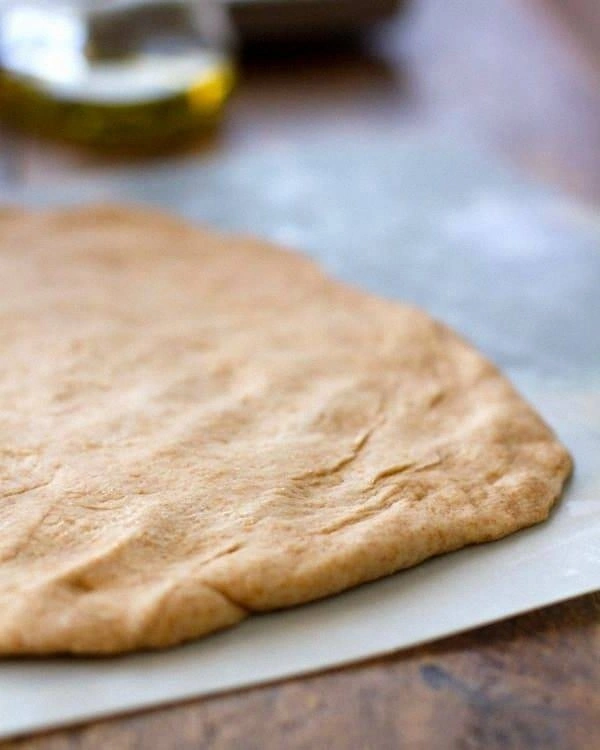
- Shape the crust. Lightly flour a pizza peel or baking sheet. Press the dough from the center outward, leaving a 1‑inch border for the crust. If the dough resists, let it rest another 5 minutes. The goal is a thin, even base that’s still slightly thicker at the edge for that perfect bite.
- Second rise. Cover the shaped dough loosely with plastic wrap and let it sit for 20‑30 minutes. This final proof allows the gluten to relax one more time, ensuring a tender interior. You’ll see the edges puff slightly, hinting at the airy texture to come.
- Preheat the oven. While the dough rests, place a pizza stone on the middle rack and crank the oven to 500°F (260°C). Let the stone heat for at least 30 minutes; the stone’s intense heat creates that coveted leopard‑spot blister on the crust. If you don’t have a stone, a heavy‑duty baking sheet turned upside down works in a pinch.
- Bake to perfection. Slide the topped pizza onto the preheated stone. Bake for 10‑12 minutes, or until the crust is golden‑brown and the cheese bubbles vigorously. The edges should crackle like thin ice, and the bottom will have a deep, smoky aroma. Remove the pizza, let it rest for 2 minutes, then slice. That sizzle when it hits the stone? Absolute perfection.
That's it — you did it. But hold on, I've got a few more tricks that'll take this to another level. Trust me, once you master the basics, the sky's the limit for flavor experiments and texture tweaks. Keep reading, and you’ll become the pizza maestro your friends never knew they needed.
Insider Tricks for Flawless Results
The Temperature Rule Nobody Follows
Never let your dough sit in a drafty kitchen; a consistent 75°F (24°C) environment is ideal for yeast activity. If your home is cooler, create a makeshift proofing box by placing the bowl in an off‑oven with the light on. The gentle heat mimics a professional bakery’s proofing cabinet and cuts rise time by 20%. I once left the dough on a windowsill during a chilly November evening and ended up with a dense, flat crust—lesson learned.
Why Your Nose Knows Best
Instead of watching the clock obsessively, trust the aroma. When the dough has doubled, it will give off a faint, sweet, yeasty perfume that’s unmistakable. If you smell a sour, fermented scent, you’ve over‑proofed and the dough may collapse in the oven. This sensory checkpoint is a lifesaver for busy cooks who can’t constantly check the timer.
The 5‑Minute Rest That Changes Everything
After shaping the dough, let it rest for exactly five minutes before adding sauce. This short pause allows the gluten to relax, preventing the crust from snapping back when you stretch it. A friend once skipped this step and ended up with a crust that curled into a bowl—great for soup, terrible for pizza.
Cold Fermentation for Flavor Boost
If you have the time, let the dough ferment in the fridge for 24‑48 hours after the first rise. The slow fermentation deepens the flavor, giving the crust a subtle tang that pairs beautifully with tomato sauce. Just bring the dough to room temperature for 30 minutes before shaping, and you’ll have a pizza that tastes like it’s been aged in a wood‑fire oven.
Oil the Edge, Not the Whole Dough
Brush a thin layer of olive oil just on the outer rim of the crust before baking. This creates a glossy, caramelized edge that crackles delightfully, while the interior stays soft. Too much oil on the whole dough can make it greasy; a light brush is all you need for that restaurant‑quality finish.
Creative Twists and Variations
This recipe is a playground. Here are some of my favorite ways to switch things up:
Herb‑Infused Dough
Add 1 tbsp dried Italian herbs to the dry mix for a fragrant crust that pairs beautifully with mozzarella and fresh tomatoes. The herbs bloom in the oven, releasing aromatic oils that perfume the entire kitchen.
Spicy Chili Oil Kick
Replace the olive oil with a chili‑infused oil and sprinkle red pepper flakes into the dough. The result is a subtle heat that lingers on the palate, perfect for topping with pepperoni or roasted vegetables.
Whole Grain Sesame Crunch
Stir in 2 tbsp toasted sesame seeds after the first knead. The seeds add a nutty crunch that contrasts with the soft interior, making each bite interesting and satisfying.
Sweet Breakfast Pizza
Swap the honey for maple syrup, top the baked crust with ricotta, fresh berries, and a drizzle of extra syrup. It transforms the dough into a breakfast treat that’s both wholesome and indulgent.
Gluten‑Free Adaptation
Use a 1‑to‑1 gluten‑free flour blend in place of the whole‑wheat and all‑purpose flours, and add 1 tsp xanthan gum. The texture will be slightly denser, but the flavor remains robust, and you can still enjoy a healthier crust.
Storing and Bringing It Back to Life
Fridge Storage
Place the dough in a lightly oiled airtight container and store it in the refrigerator for up to three days. The cold slows yeast activity, preserving flavor while allowing the dough to develop a deeper, slightly sour note. Before using, let it sit at room temperature for 30 minutes to regain elasticity.
Freezer Friendly
Divide the dough into individual balls, wrap each tightly in plastic wrap, then place them in a zip‑top freezer bag. They’ll keep for up to one month. When you’re ready, thaw overnight in the fridge, then bring to room temperature for 30 minutes before shaping. A splash of water on the surface before baking restores that fresh‑out‑the‑oven texture.
Best Reheating Method
To revive leftover pizza, preheat a skillet over medium heat, add a few drops of water to the pan, and cover with a lid. The steam re‑hydrates the crust while the bottom crisps up, giving you a slice that’s almost as good as fresh. Avoid the microwave—it turns the crust rubbery.