Picture this: I’m halfway through a week of bland dinners, the fridge is a sad collection of leftovers, and a friend texts me a link to a recipe that promises “instant pot chicken curry that bursts with bold flavors.” I’m skeptical, but the promise of a one-pot wonder that feels like a five-star restaurant meal in a fraction of the time hooks me. I open the link, skim the ingredients, and my stomach does a little happy dance. I’ve tried a dozen “instant pot curry” recipes, and most of them taste like they were rushed, missing depth or drowning in oil. This one, however, feels different. The title alone says it’s bold, and the short description hints at a sauce that clings to the chicken like a velvet blanket.
I’m not one to shy away from kitchen experiments, but I also don’t want to waste time on a recipe that will end up on the back burner. So I set the Instant Pot to “Sauté,” heat the oil, and the first thing that hits me is that faint, comforting scent of cumin and coriander, a scent that makes my mouth water before I even taste the first bite. The onions begin to caramelize, turning a golden amber that sends a wave of sweet aroma across the kitchen. The garlic and ginger hit the pan, sizzling with a crisp pop that’s almost a drumbeat of anticipation. By the time the tomatoes join, the mixture is a fragrant, simmering broth that feels like a promise of something truly delicious.
What makes this version stand out is that it’s not just a collection of spices and chicken; it’s a carefully orchestrated dance of textures and flavors that elevate the dish from simple to unforgettable. The Instant Pot does the heavy lifting, but the real magic comes from the technique—searing the aromatics first, then deglazing, and finally letting the curry simmer under pressure so the flavors penetrate the meat. I dare you to taste this and not go back for seconds. I’ll be honest—by the time the first spoonful hits my tongue, I’m already planning the next batch. This is hands down the best version you’ll ever make at home.
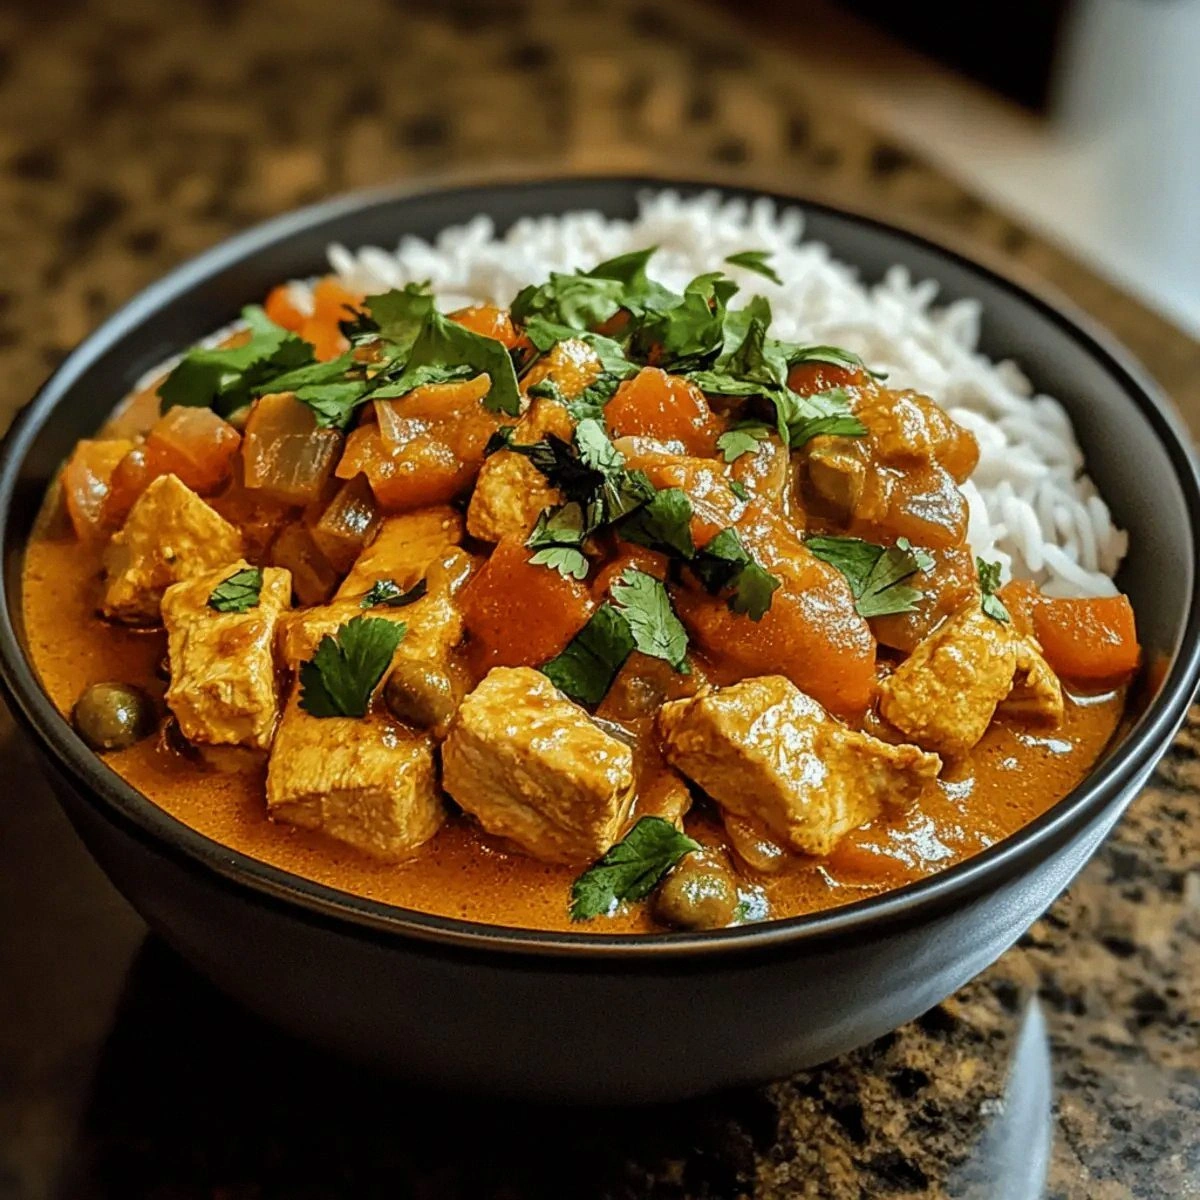
If you’ve ever struggled with curry that’s either too watery or too thick, you’re not alone—this recipe fixes that with a simple ratio of coconut milk and a touch of simmering time that locks in moisture without making it soupy. Picture yourself pulling this out of the Instant Pot, the kitchen smelling incredible, steam curling around the lid like a fragrant halo. The first bite is a burst of heat from the red chili, a mellow sweetness from the tomatoes, and a creamy texture that coats the chicken like velvet. This isn’t just cooking; it’s an experience you’ll want to replay again and again.
Let me walk you through every single step—by the end, you’ll wonder how you ever made it any other way. I’m going to break it down into manageable chunks, sprinkle in some kitchen hacks, and give you insider tips that will make this dish a staple in your rotation. Ready? Let’s dive in.
What Makes This Version Stand Out
- Flavor: The blend of cumin, coriander, and garam masala creates a complex, layered taste that’s both aromatic and satisfying. The coconut milk adds a subtle sweetness that balances the heat from the chili powder.
- Texture: The chicken thighs stay tender and juicy thanks to pressure cooking, while the sauce thickens to a silky consistency without clumping.
- Convenience: With the Instant Pot’s “Sauté” and “Pressure Cook” settings, you’re looking at a total time of 45 minutes—prep in 15, cook in 30.
- Versatility: This recipe adapts to whatever you have on hand—use ghee instead of oil, swap coconut milk for heavy cream, or add a handful of spinach at the end.
- Make‑Ahead Potential: The curry holds up wonderfully in the fridge for up to 4 days and freezes for up to 2 months, making it perfect for meal prep.
- Crowd‑Pleaser: Even the pickiest eaters love the mild heat and the comforting, creamy sauce that pairs beautifully with rice or naan.
- Ingredient Quality: Fresh, high‑quality spices make a world of difference; if you can’t find fresh, use the best powdered versions you have.
- Unique Twist: A splash of coconut milk and a final sprinkle of fresh cilantro give the dish a bright, tropical finish that sets it apart.
Alright, let’s break down exactly what goes into this masterpiece...
Inside the Ingredient List
The Flavor Base
The foundation of any great curry is its aromatic base. The onion, when sautéed until translucent, releases a natural sweetness that grounds the dish. Garlic and ginger bring sharp, fresh notes that cut through the richness of the coconut milk. If you’re missing one of these, don’t worry—use 1 teaspoon of garlic powder or a pinch of ground ginger, but the fresh versions will give you the most vibrant flavor.
Tomatoes add acidity and depth. They break down into a silky sauce that balances the spices. If you prefer a thicker sauce, use a can of diced tomatoes instead of fresh; just be sure to drain the excess liquid.
The Texture Crew
Chicken thighs are the star of this dish. Their higher fat content keeps the meat juicy even after pressure cooking. If you’re a fan of leaner protein, you can use chicken breasts, but be prepared for a slightly drier result—just keep a close eye on the cooking time.
Coconut milk is the secret to that silky, creamy texture. It’s thick enough to coat the chicken but light enough to stay pourable. For a lower‑fat version, substitute half coconut milk with low‑fat Greek yogurt, whisked to smoothness, to keep the sauce creamy without the calories.
The Unexpected Star
Fresh cilantro isn’t just a garnish—it adds a bright, herbal note that cuts through the richness. If you’re not a fan of cilantro, try fresh mint or a splash of lime juice for a similar lift.
Red chili powder is the heat source. If you’re sensitive to spice, reduce it to a pinch or use mild paprika. The flavor remains complex even with a lower heat level.
The Final Flourish
Garam masala is the finishing spice that ties everything together. It’s a blend of warm spices like cardamom, cinnamon, and cloves. If you don’t have garam masala on hand, a pinch of cinnamon and a dash of ground cloves can mimic the flavor profile.
Everything’s prepped? Good. Let’s get into the real action...
The Method — Step by Step
- Turn on the Instant Pot and select “Sauté.” Add 2 tablespoons of vegetable oil or ghee and let it heat until shimmering. This is the moment of truth—watch the oil swirl. Add the diced onion and cook until it turns translucent and starts to brown on the edges; this caramelization adds depth.
- Add the minced garlic and grated ginger. Sauté for 30 seconds until fragrant—watch for a slight pop. This releases their essential oils and prevents them from burning.
- Stir in the cumin, coriander, turmeric, and red chili powder. Cook for 1 minute, stirring constantly, until the spices toast and their aromas intensify. The mixture should smell toasty like a toasted bread crumb.
- Add the diced tomatoes and a splash of water to deglaze the pot, scraping up any browned bits. These bits are flavor gold and ensure nothing sticks to the bottom.
- Place the chicken thighs in the pot, turning them to coat with the spice mixture. Don’t overcrowd; you want the chicken to sear slightly before pressure cooking.
- Pour in the coconut milk, ensuring the chicken is mostly submerged. Add a teaspoon of salt to taste. Stir gently to combine.
- Close the Instant Pot lid, set the valve to “Sealing,” and select “Pressure Cook” on high for 10 minutes. After the cooking cycle, allow a natural pressure release for 10 minutes, then quick‑release any remaining pressure.
- Open the lid, stir in the garam masala, and let the curry simmer on “Sauté” for 5 minutes to thicken. The sauce should coat the chicken, not be watery.
- Finally, stir in the fresh cilantro and taste. Adjust salt or spice if needed. Serve hot over steamed rice or warm naan.
That’s it—you did it. But hold on, I’ve got a few more tricks that will take this to another level. The next section will dive into insider tips that can make your curry even more unforgettable.
Insider Tricks for Flawless Results
The Temperature Rule Nobody Follows
Many people skip the “Sauté” step before pressure cooking, which can leave the spices under‑developed. By searing the aromatics first, you create a flavor base that’s richer and more aromatic. The Instant Pot’s high pressure then locks in those flavors, so the final dish is intensely fragrant.
Why Your Nose Knows Best
Smell is a powerful indicator of doneness. When the spices are toasted, the aroma changes from raw to toasted, giving a nutty, warm scent. If the smell feels too raw, give it another minute; if it’s too burnt, reduce the heat.
The 5-Minute Rest That Changes Everything
After pressure release, let the curry rest for 5 minutes before serving. This short rest allows the flavors to settle and the sauce to thicken slightly. A friend once skipped this step and the sauce was thin and watery; the rest made all the difference.
The Fresh Cilantro Boost
Adding cilantro at the very end preserves its bright flavor and color. If you add it too early, it wilts and becomes bitter. If you’re not a fan of cilantro, a splash of lime juice can provide a similar bright note.
The One-Second Check
When the pressure release is complete, check the lid. If it’s still slightly tilted, let it sit for another minute. This ensures the sauce is fully set and not too watery.
The Secret to a Thick Sauce
If your sauce is too thin, simply turn the Instant Pot back to “Sauté” and let it reduce for 3–5 minutes. Stir constantly to avoid sticking. This trick is a lifesaver when the curry turns out too runny.
Creative Twists and Variations
This recipe is a playground. Here are some of my favorite ways to switch things up:
Spicy Peanut Twist
Swap coconut milk for a mixture of coconut milk and creamy peanut butter. Add a dash of soy sauce and a squeeze of lime for a nutty, tangy kick that pairs well with jasmine rice.
Mango Madness
Stir in diced ripe mango during the last 5 minutes of simmering. The fruit adds a sweet, tropical contrast to the heat and makes the dish perfect for summer.
Vegetarian Version
Replace chicken with diced butternut squash or paneer. Keep the spices the same; the result is a hearty, plant‑based curry that still delivers that creamy, aromatic profile.
Keto‑Friendly
Use full‑fat coconut milk, reduce the tomatoes, and serve over cauliflower rice. The result is a low‑carb, high‑fat dish that satisfies keto cravings while staying flavorful.
Herb‑Infused Variation
Add a handful of fresh mint or basil during the final simmer. The herbs bring a fresh, cooling counterbalance to the heat, creating a layered flavor experience.
Breakfast Curry
Serve the curry over a bed of fluffy scrambled eggs for a protein‑packed breakfast. The creamy sauce pairs wonderfully with the soft eggs, making for a satisfying morning meal.
Storing and Bringing It Back to Life
Fridge Storage
Cool the curry to room temperature, then transfer to an airtight container. Store in the refrigerator for up to 4 days. The coconut milk may separate slightly; give it a good stir before reheating.
Freezer Friendly
Divide the curry into individual portions and freeze for up to 2 months. Thaw overnight in the refrigerator before reheating. Adding a splash of water before reheating keeps the sauce from drying out.
Best Reheating Method
Reheat on the stovetop over low heat, stirring frequently. If the sauce is too thick, add a tablespoon of water or coconut milk to reach the desired consistency. Serve immediately.