I was standing in my kitchen, a pile of burnt tempura batter on the counter and a single, stubborn sweet potato on the cutting board, when my friend texted me a dare: “If you can’t turn that sweet potato into something that makes people scream ‘wow’ in the first bite, I’ll take your favorite mug.” I laughed, grabbed the sweet potato, and decided to prove that a simple ingredient could become the star of the show.
The smell of raw sweet potato, that faint earthy sweetness, mingled with the sharp tang of cold water and the fizz of carbonated water that would later be whisked into a batter so light it could float. The kitchen lights flickered, the timer ticked, and the air was thick with anticipation. I could taste the future crunch in my mind—crispy edges that crackle like thin ice, a tender interior that melts in your mouth, and that subtle, almost sweet umami that only Japanese sweet potatoes deliver. Every sense was on high alert, and I knew that if I got this wrong, the whole night would end in a pile of soggy disappointment.
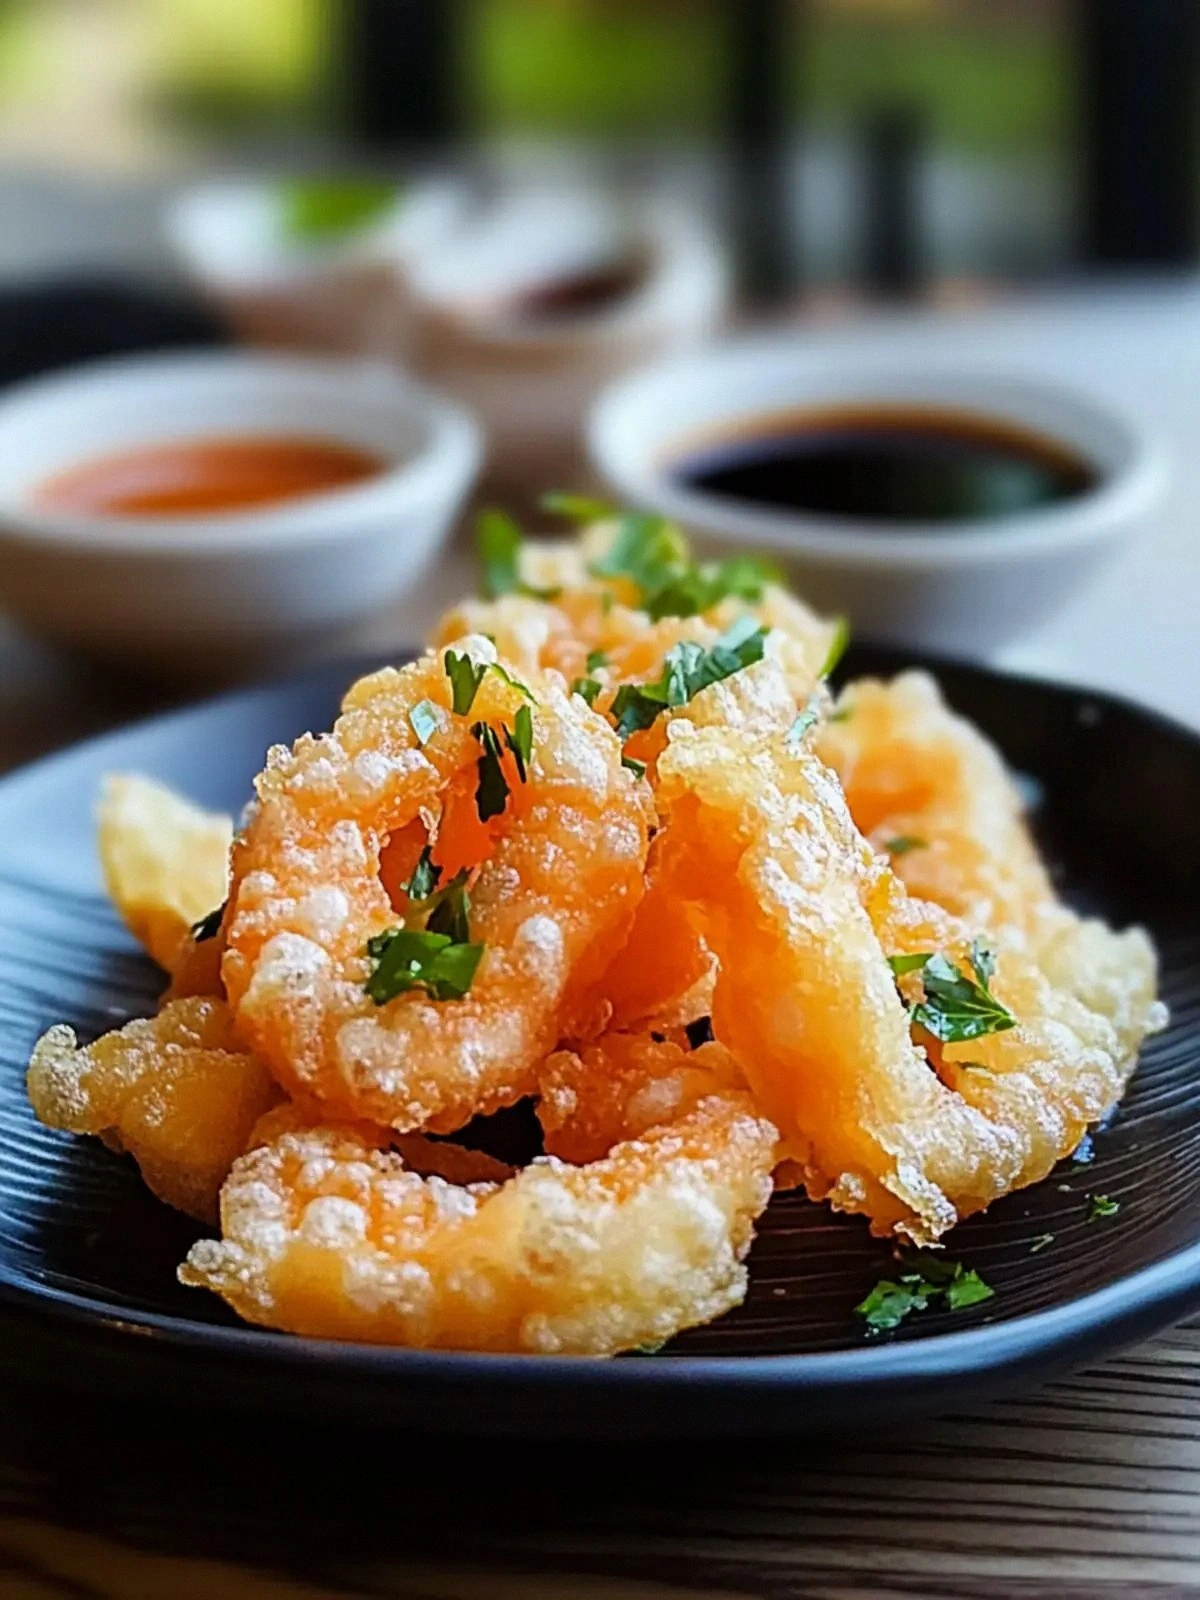
What sets this version apart from every other tempura recipe you’ve tried is the meticulous balance of hydrating the batter with carbonated water, the secret use of a half tablespoon of Japanese mayonnaise to lock in moisture, and the optional ice cubes that keep the batter cold and the oil hot. The batter is a thin, almost translucent sheet that clings to the potato slices like a delicate veil, turning into a golden, airy shell that bursts with flavor when you bite. I’ll tell you, this is hands down the best version you’ll ever make at home—because it’s not just about crispness, it’s about that instant, satisfying snap that echoes through the kitchen.
I’ll walk you through every single step, from selecting the perfect sweet potato to the final golden crunch, and by the end of this guide, you’ll wonder how you ever made tempura any other way. And trust me, once you taste the first bite, I dare you to go back for seconds. Picture yourself pulling this out of the fryer, the whole kitchen smelling incredible, and your friends gasping in delight. Let’s get started.
What Makes This Version Stand Out
- Texture: The batter’s carbonation keeps it airy, creating a light, crisp shell that shatters like thin ice.
- Flavor: Japanese sweet potato adds a natural sweetness and a subtle umami that pairs perfectly with a lightly seasoned batter.
- Speed: The recipe is ready in under 45 minutes, making it ideal for a quick dinner or a show‑stopping snack.
- Versatility: Works with any cooking oil—vegetable, canola, or even avocado for a healthier twist.
- Make‑ahead: Batter can be prepared in advance and kept in the fridge; the sweet potato slices can be frozen until ready to fry.
- Minimal Fuss: Only seven main ingredients, no complex measurements, and the batter requires no whisking—just a gentle stir.
- Visual Appeal: The golden, almost translucent batter showcases the sweet potato’s natural color, making each bite a feast for the eyes.
- Audience: Even the most skeptical snack lovers will be won over by the perfect crunch and sweet undertone.
Alright, let’s break down exactly what goes into this masterpiece…
Inside the Ingredient List
The Hydration Duo
Cold water and carbonated water are the backbone of our batter. The cold water tempers the flour’s gluten, keeping the batter light, while the carbonated water injects tiny bubbles that expand in hot oil, giving that airy crunch. Skipping either one will result in a denser, heavier coating that clings to the potato instead of floating.
If you’re in a rush, you can replace carbonated water with sparkling mineral water for a similar effect. Just remember to chill the mixture immediately after mixing to prevent premature thickening.
The Texture Crew
Cornstarch and cake flour (or all-purpose flour) are the main structural elements. Cornstarch keeps the batter from forming gluten, which would make it chewy, while cake flour’s low protein content ensures the batter stays tender and crisp. Together, they create a delicate, almost translucent shell that clings to the sweet potato slices.
If you can’t find cake flour, all-purpose flour will do, but you’ll want to reduce the amount by about 10% to avoid excess gluten. A pinch of baking soda can also help the batter rise slightly, but use it sparingly.
The Unexpected Star
Japanese mayonnaise or whisked egg is a game-changer. The mayonnaise adds a subtle richness and acts as a binder, keeping the batter from separating. If you prefer a vegan version, whisked egg is the next best choice. Either option enhances the flavor profile and contributes to that glossy, golden finish.
You can experiment with different mayonnaise brands; a thicker, more flavorful mayo will deepen the taste. Just keep the quantity consistent—half a tablespoon is all you need.
The Final Flourish
Ice cubes are optional but highly recommended. They keep the batter cold, preventing it from thickening too quickly when it hits the hot oil. Without them, the batter can become sluggish, leading to uneven frying.
If you don’t have ice cubes, you can substitute crushed ice or a handful of frozen peas in a blender to chill the batter. The key is to maintain a low temperature until the batter is ready to fry.
Everything's prepped? Good. Let's get into the real action…
The Method — Step by Step
- Begin by peeling the Japanese sweet potato and slicing it into uniform 1/4-inch thick rounds. The uniformity ensures even cooking and a consistent crunch. I always use a mandoline slicer to keep the thickness precise; this small tool saves time and guarantees that each bite has the same delightful texture.
- In a mixing bowl, combine the cold water and carbonated water. Stir gently until the fizz begins to dissipate, indicating that the water is ready to absorb the flour. This step is crucial—if the water is too hot, the batter will seize up and become gummy.
- Add the cornstarch and cake flour to the liquid, whisking lightly to avoid lumps. The batter should be smooth and slightly runny, resembling a thin pancake batter. I like to use a whisk with a wide, shallow bowl to keep the mixture airy.
- Stir in the half tablespoon of Japanese mayonnaise (or whisked egg). This ingredient adds a subtle richness and helps bind the batter. If you’re using egg, whisk it until it's frothy before adding to avoid curdling.
- Drop two ice cubes into the batter and stir gently. The ice will chill the mixture instantly, preventing the batter from thickening prematurely. Keep the batter cool until you’re ready to fry; this ensures a crisp coating.
- Heat a deep pan or fryer to 180°C (350°F). Use a thermometer to check the temperature; if you don’t have one, drop a small piece of batter into the oil—if it sizzles and rises to the surface in a few seconds, you’re good.
- Dip each sweet potato slice into the batter, allowing excess to drip off. The batter should coat the slice evenly, forming a thin shell. Place the coated slices carefully into the hot oil, making sure not to overcrowd the pan, as this will lower the oil temperature.
- Fry each side for 2–3 minutes until the batter turns golden brown and crispy. The aroma of frying sweet potato will fill the kitchen, and the sizzling sound is pure music. Flip only once to keep the coating intact.
- Remove the tempura from the oil using tongs and place them on a paper towel-lined plate to drain excess oil. The paper towels absorb the oil while keeping the tempura crisp.
- Serve immediately with a sprinkle of sea salt and a side of tangy ponzu sauce or a simple soy sauce dip. The salt enhances the natural sweetness of the potato, and the ponzu adds a citrusy brightness that cuts through the richness.
That’s it — you did it. But hold on, I've got a few more tricks that'll take this to another level…
Insider Tricks for Flawless Results
The Temperature Rule Nobody Follows
Many cooks assume any hot oil will do, but the key is a steady 180°C (350°F). If the oil is too hot, the batter will burn before the sweet potato cooks; too cool, and it will soak up oil, ruining the crispness. Use a thermometer or the water droplet test to maintain the right heat. I’ve learned that a steady temperature is the secret to achieving that perfect, airy crunch.
Why Your Nose Knows Best
Trust your nose when the batter begins to sizzle and the sweet potato emits a caramelized aroma. That scent means the coating is crisping properly. If the smell is more of a raw batter or greasy oil, adjust the heat or reduce the batter’s thickness. Your nose is a reliable gauge for perfection.
The 5-Minute Rest That Changes Everything
After battering the slices, let them rest on a wire rack for five minutes before frying. This brief rest allows the batter to set and reduces excess moisture, preventing steam pockets that would make the coating soggy. I always set the rack in the fridge for a quick chill, which also keeps the batter cold for the next batch.
Double Fry for Extra Crunch
If you’re a crunch enthusiast, fry the tempura twice. First fry at 170°C (340°F) until just lightly golden, remove, and let rest. Then fry again at 190°C (375°F) until a deep golden color appears. This technique creates an ultra-crispy shell that still keeps the sweet potato tender inside.
The Sweet Potato Prep Hack
Cut the sweet potato into uniform slices, then rinse them under cold water to remove surface starch. Pat dry with a towel before battering. Removing starch helps the batter adhere better and reduces the risk of a gummy coating.
Creative Twists and Variations
This recipe is a playground. Here are some of my favorite ways to switch things up:
Spicy Sriracha Glaze
After frying, toss the tempura in a light drizzle of sriracha mixed with a splash of honey. The sweet heat complements the natural sweetness of the potato and gives a vibrant pop of color.
Herb‑Infused Batter
Add finely chopped fresh herbs like parsley or cilantro to the batter. The herbs infuse the coating with fresh, green notes that contrast nicely with the sweet potato’s earthiness.
Cheesy Tempura
Sprinkle grated Parmesan or a blend of mozzarella and cheddar over the hot tempura before serving. The cheese melts into the crispy shell, creating a gooey, savory layer.
Miso‑Sweet Potato Tempura
Replace the mayonnaise with a tablespoon of white miso paste. The miso adds depth, umami, and a slightly salty flavor that elevates the dish into a more complex tasting experience.
Vegan Vibes
Use a plant‑based mayonnaise and substitute the egg with a splash of aquafaba. The result is a completely vegan version that still delivers that signature light, airy crunch.
Dessert‑Style Tempura
Serve the tempura with a drizzle of dark chocolate sauce and a dusting of powdered sugar. This sweet variation turns the snack into a decadent dessert that feels indulgent yet balanced.
Storing and Bringing It Back to Life
Fridge Storage
Store leftover tempura in an airtight container in the refrigerator for up to 2 days. Keep the slices on a paper towel to absorb excess moisture before sealing. The batter will firm up, but the texture remains acceptable if reheated properly.
Freezer Friendly
For longer storage, freeze the tempura on a parchment‑lined tray until solid, then transfer to a freezer bag. They can stay in the freezer for up to 3 months. When ready to eat, thaw overnight in the fridge before reheating.
Best Reheating Method
Reheat in a hot skillet or oven at 200°C (400°F) for 5–7 minutes, or in a microwave for 30 seconds followed by a quick skillet finish. Add a tiny splash of water before reheating to create steam that restores moisture and crispness. The result is almost as good as fresh.