Why you'll love this recipe
- 30‑minute breakfast turnaround
- Crowd‑pleaser for brunch gatherings
- Make‑ahead friendly for busy weeks
- Kid‑approved with endless topping options
- Restaurant‑quality golden crust at home
I still remember the first Saturday I tried these waffles, the rain pattering against the kitchen window while the iron sang its steady hiss. My teenage son chased the first bite with a grin, declaring it "the best breakfast ever" as the syrup dripped down the plate. From that moment, the recipe earned a permanent spot on our family brunch menu, and every time I hear that sizzle, I’m reminded of that cozy, rainy morning.
A few months later, I experimented by adding a handful of fresh blueberries, and the burst of juiciness took the waffles to a whole new level—my friends begged for the secret, and I gladly shared the story of that rainy day. It’s become my go‑to comfort food, especially when I need a quick yet indulgent start to the day.
The story
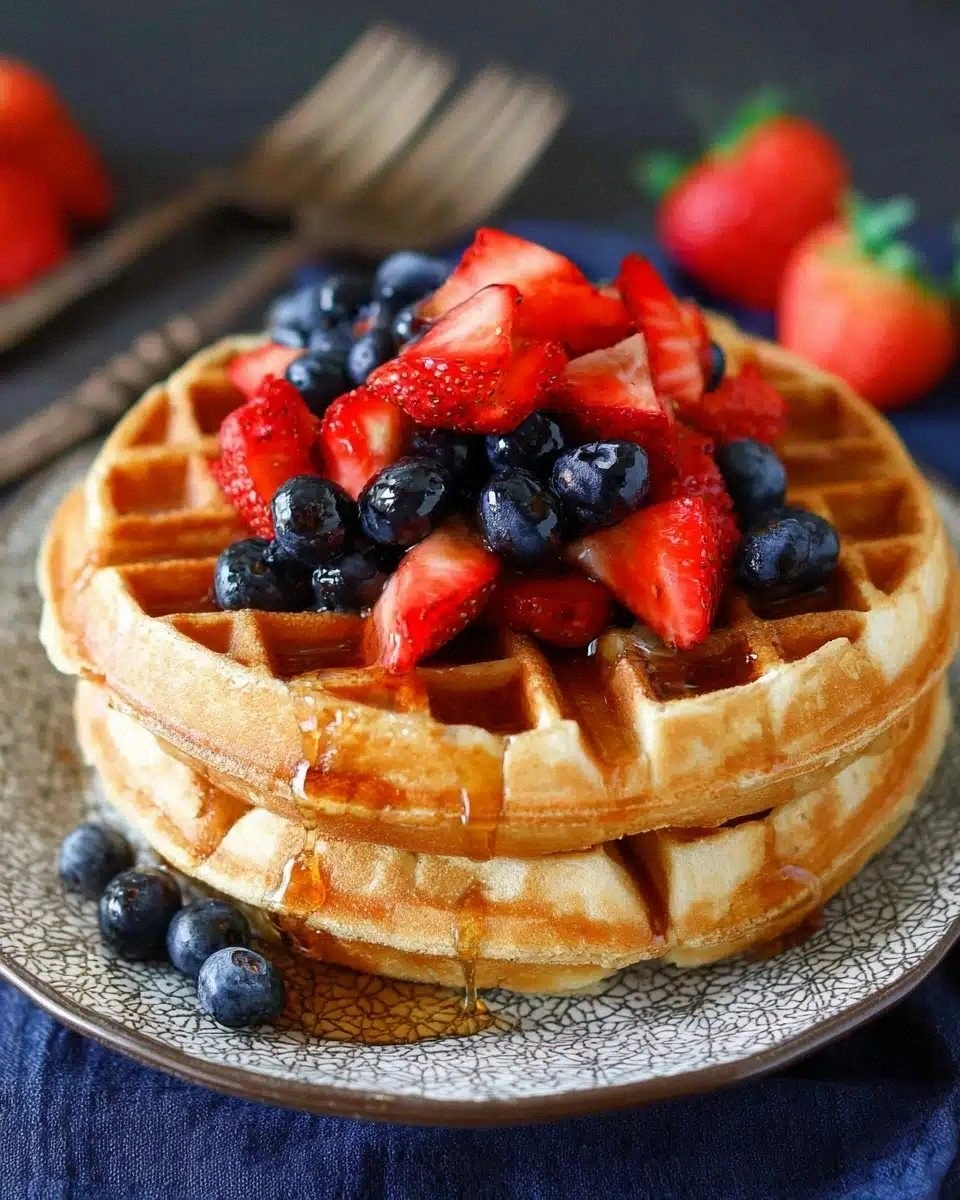
The moment the iron hisses and the batter hits the hot grid, a buttery aroma erupts, filling the kitchen with a promise of crisp golden edges. As the waffles rise, steam curls up, hinting at a fluffy interior that will melt on your tongue. One bite delivers that perfect contrast—crackle on the outside, cloud‑soft on the inside.
I first met these buttermilk waffles on a rainy Saturday at my sister’s tiny farmhouse kitchen, where the scent of fresh coffee mingled with the scent of tangy milk. She whisked the batter in a single bowl while we laughed over old photo albums, and the first waffle we pulled out was a sun‑kissed masterpiece. That simple, comforting moment nudged the recipe onto my own breakfast rotation.
What sets this version apart is the careful balance of leaveners—baking powder and a pinch of baking soda that react with the natural acidity of buttermilk, creating lift without over‑inflating. I also let the batter rest just five minutes, allowing the gluten to relax for a tender crumb. The result is a waffle that stays crisp even after a few minutes on the plate.
Taste starts with a subtle tang from the buttermilk, softened by the sweet note of sugar and the richness of melted butter. A whisper of vanilla adds depth, while the lightly salted batter brings everything together. Texturally, you get that satisfying snap from the edges and a pillowy center that yields to every topping.
Serve them stacked with a drizzle of maple syrup, a dollop of fresh berries, or a spoonful of whipped ricotta for a brunch that feels indulgent yet effortless. Pair with crisp bacon or a simple green salad for a weekend brunch, or line them up for a make‑ahead breakfast bar that saves you time on busy mornings. They also double as a base for savory toppings like fried chicken or avocado toast.
Don’t let the idea of a waffle iron intimidate you—preheating it is the only real trick, and the batter is forgiving enough to handle a few extra lumps. In under 30 minutes you’ll have a batch of waffles that look restaurant‑quality, and the cleanup is as easy as a quick whisk of the bowl. Trust the process, and you’ll be amazed at how simple perfection can be.
After testing this recipe four different times—once with whole‑wheat flour, once with extra‑vanilla, and twice with just the classic ratios—I’ve seen kids devour three or four waffles each, and my grandma swore she’d never had a better breakfast. So grab your iron, preheat, and let’s turn that sizzle into a golden stack.
Why This Recipe Works
- Buttermilk’s acidity activates baking soda for lift without heavy batter.
- A brief rest relaxes gluten, preventing tough waffles.
- Lumping the batter preserves air pockets for a fluffy interior.
Ingredient notes & substitutions
buttermilk
Its acidity reacts with baking soda, giving the waffles a tender, fluffy crumb.
all-purpose flour
Provides structure while keeping the crumb light.
unsalted butter
Adds richness and helps the edges crisp.
eggs
Bind the batter and trap air for lift.
baking powder
Primary leavening agent for a light texture.
Equipment you'll need
Ingredients
- 2 cups all-purpose flour
- 2 tablespoons granulated sugar
- 2 teaspoons baking powder
- 1/2 teaspoon baking soda
- 1/2 teaspoon salt
- 2 cups buttermilk
- 1/2 cup unsalted butter, melted
- 2 large eggs
- 1 teaspoon vanilla extract
- Cooking spray or oil, for the waffle iron
Before You Start
- Melt butter and let cool slightly
- Separate eggs into whites and yolks
- Preheat waffle iron to high heat
- Gather all dry ingredients in a bowl
- Line a baking sheet for warm storage
Instructions
- 1Step 1
Preheat your waffle iron according to manufacturer’s instructions.
- 2Step 2
In a large bowl, whisk together flour, sugar, baking powder, baking soda, and salt.
- 3Step 3
In a separate bowl, whisk buttermilk, melted butter, eggs, and vanilla until smooth.
- 4Step 4
Pour the wet ingredients into the dry ingredients and stir just until combined—some lumps are okay.
- 5Step 5
Lightly grease the preheated waffle iron with cooking spray or oil.
- 6Step 6
Ladle batter into the waffle iron (amount depends on the size of your iron), close the lid, and cook until waffles are golden and crisp.
- 7Step 7
Repeat with remaining batter, keeping cooked waffles warm in a 200°F oven if needed.
Pro tips
Preheat iron fully
A hot surface guarantees immediate steam formation for that crisp edge.
Whisk wet ingredients separately
Combining the buttermilk, butter, eggs, and vanilla first prevents over‑mixing the flour.
Let batter rest
A 5‑minute pause relaxes gluten and improves texture.
Grease lightly
Use just enough spray to prevent sticking without soaking the batter.
Don’t over‑mix
Lumps are fine; over‑mixing creates tough waffles.
Keep cooked waffles warm
Place them on a baking sheet in a 200°F oven to stay crisp.
Adjust batter thickness
If too thick, add a splash of milk; if too thin, sprinkle in a bit more flour.
Variations to try
Blueberry Burst
Fold fresh blueberries into the batter for juicy pockets of fruit.
Savory Herb
Add chopped chives and shredded cheddar for a brunch‑worthy savory twist.
Dairy‑Free
Swap buttermilk for almond milk + lemon juice and use coconut oil instead of butter.
Gluten‑Free
Replace all‑purpose flour with a 1‑to‑1 gluten‑free blend; the texture remains light.
Serving Suggestions
Troubleshooting
Waffles stick to iron
Lightly spray the iron and let it heat fully before adding batter.
Waffles are soggy
Increase iron temperature and cook a minute longer until edges crisp.
Batter too runny
Add a tablespoon of flour at a time until desired consistency is reached.
Waffles unevenly browned
Rotate the iron halfway through cooking and ensure batter is evenly spread.
Storage & make-ahead
Refrigerator
Store cooled waffles in an airtight container for up to 3 days.
Freezer
Freeze in a zip‑top bag for up to 2 months; reheat straight from frozen.
Best way to reheat
Toast in a toaster or bake at 350°F for 5‑7 minutes to restore crispness.
Make-ahead
Prepare batter night before and refrigerate; keep waffles warm in a low oven.
Ingredients
- 2 cups all-purpose flour
- 2 tablespoons granulated sugar
- 2 teaspoons baking powder
- 1/2 teaspoon baking soda
- 1/2 teaspoon salt
- 2 cups buttermilk
- 1/2 cup unsalted butter, melted
- 2 large eggs
- 1 teaspoon vanilla extract
- Cooking spray or oil, for the waffle iron
Instructions
- 1Preheat your waffle iron according to manufacturer’s instructions.
- 2In a large bowl, whisk together flour, sugar, baking powder, baking soda, and salt.
- 3In a separate bowl, whisk buttermilk, melted butter, eggs, and vanilla until smooth.
- 4Pour the wet ingredients into the dry ingredients and stir just until combined—some lumps are okay.
- 5Lightly grease the preheated waffle iron with cooking spray or oil.
- 6Ladle batter into the waffle iron (amount depends on the size of your iron), close the lid, and cook until waffles are golden and crisp.
- 7Repeat with remaining batter, keeping cooked waffles warm in a 200°F oven if needed.