Picture this: you’re standing in a kitchen that smells like butter and vanilla, the timer on your phone buzzes, and you’re staring at a handful of almond flour that feels more like a mystery than a pantry staple. I was halfway through a late‑night baking experiment, trying to rescue a batch of cookies that had turned out flat and crumbly, when the idea struck me—what if the secret to the perfect almond cookie was just a single, unexpected tweak? That tweak was the way I folded the egg white, and the result was a cookie that practically melts in your mouth.
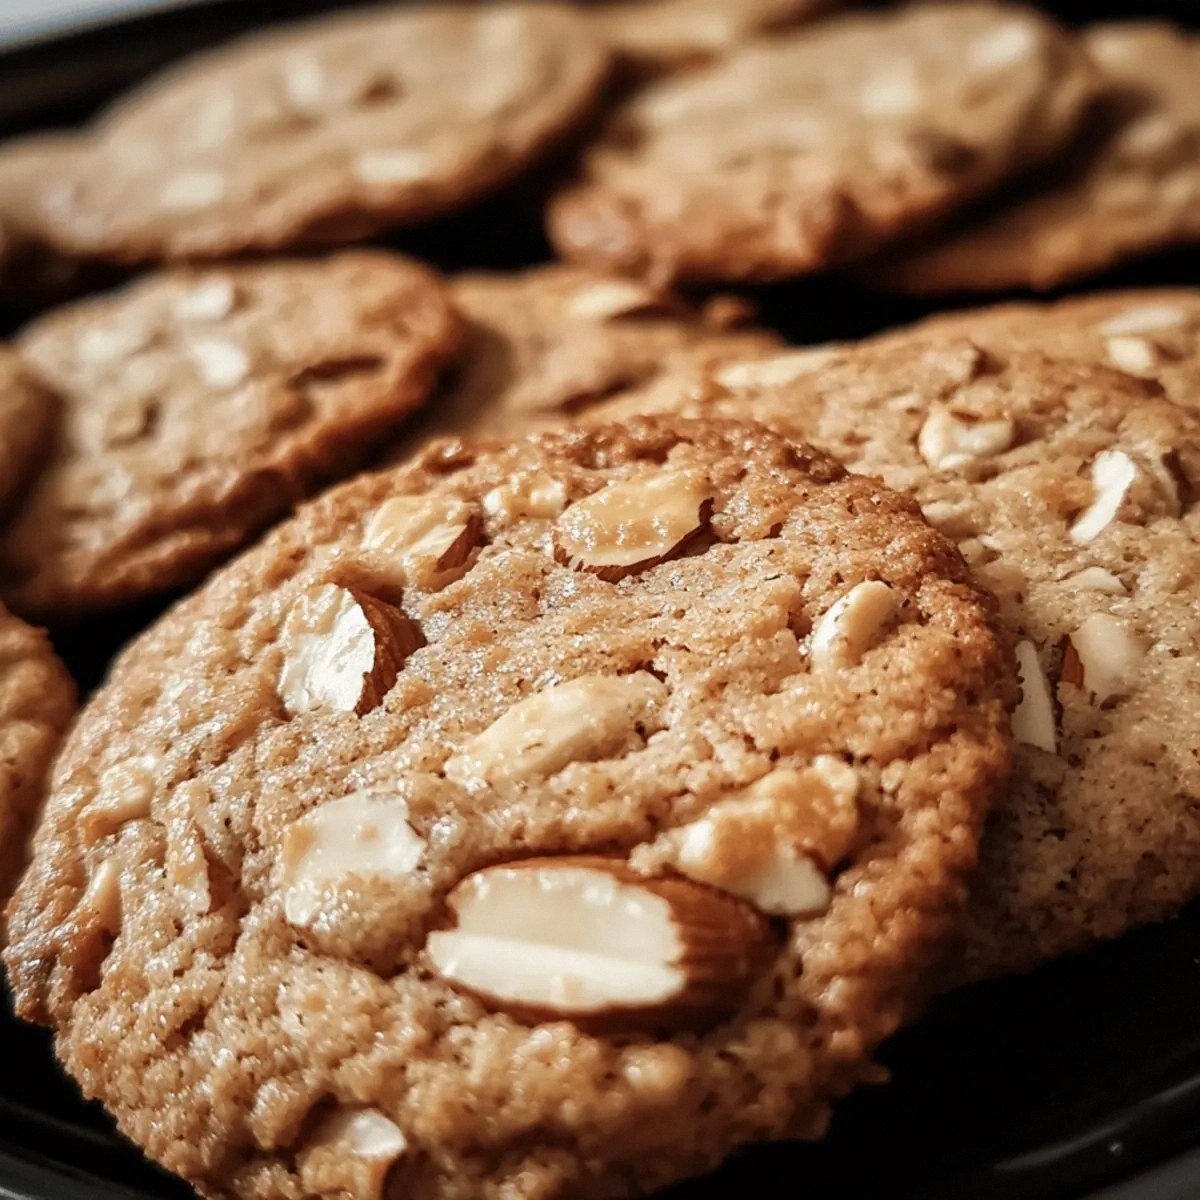
I dare you to taste this and not go back for seconds. The first bite is a soft, pillowy center that gives way to a crisp edge, like a gentle snowfall that ends with a crack of ice. The almond flavor is bold yet not overpowering, and the subtle hint of almond extract lifts the whole thing to a new level. If you’ve ever been disappointed by a gluten‑free cookie that tastes like cardboard, this one will make you question everything you thought you knew about baking.
Most recipes get this completely wrong. They either over‑bake the cookies, leaving them dry, or under‑bake them, resulting in a doughy mess. The trick lies in the delicate balance between the almond flour’s natural moisture and the butter’s richness. By letting the butter soften at room temperature and mixing it just until it’s incorporated, you preserve that tender crumb that makes these cookies stand out.
If you've ever struggled with gluten‑free baking, you're not alone — and I've got the fix. The secret is to treat almond flour like you would wheat flour, but with a few extra steps to keep it from turning gritty. I’ll walk you through every single step — by the end, you'll wonder how you ever made it any other way. From the precise way to whisk the egg white to the exact baking time, this recipe covers it all.
And now the fun part. Before we dive into the method, let’s talk about why this version is hands down the best you'll ever make at home. The combination of a light, airy texture with a deep nutty flavor, all wrapped in a buttery crust, is a game‑changer that will have friends begging for the recipe. Trust me, the first bite will make you feel like you’ve discovered a hidden gem in your own kitchen.
Picture yourself pulling these out of the oven, the whole kitchen smelling incredible, and the aroma drifting to the living room where everyone is waiting for a taste. That scent alone is a promise of the sweet, nutty experience that follows. The cookies will look like tiny golden moons, each with a glossy finish that hints at the buttery goodness inside.
Now, let’s break down exactly what goes into this masterpiece. We’ll examine each ingredient, why it matters, and what happens if you skip it. By the end of this section, you’ll have a deeper appreciation for every component and feel confident tweaking the recipe to your own taste.
Okay, ready for the game‑changer? I’m about to reveal the little detail that turns a standard almond cookie into a melt‑in‑your‑mouth delight. Stay with me here — this is worth it.
What Makes This Version Stand Out
- Texture: The cookies boast a soft, chewy center that feels like a cloud, while the edges crisp up to a golden perfection. This duality is achieved through precise timing and the right balance of ingredients.
- Flavor: The almond extract amplifies the natural nutty profile of the flour, creating a depth that ordinary cookies lack. It’s subtle enough to not overpower, but unmistakable.
- Simplicity: With only nine ingredients, the recipe is straightforward yet delivers a complex taste. No secret spices or obscure techniques are required.
- Uniqueness: The folded egg white technique creates a lightness that’s rarely seen in gluten‑free cookies, making them feel airy and less dense.
- Crowd Reaction: Friends who try these will often say they taste like a bakery‑made treat. The cookies are perfect for parties, gifting, or a quiet evening snack.
- Ingredient Quality: Using high‑quality almond flour and butter ensures the best flavor. The recipe works best with unsalted butter to control the salt level precisely.
- Cooking Method: The method involves gentle mixing and a short baking time, which preserves moisture without over‑baking.
- Make‑ahead Potential: These cookies can be made in advance, stored in an airtight container, and enjoyed for days. They’re even great for packing into lunches or gifting.
Alright, let's break down exactly what goes into this masterpiece...
Inside the Ingredient List
The Flavor Base
Almond Flour: This is the heart of the cookie. It provides the nutty flavor and the chewy texture that keeps the cookies from falling apart. If you skip it, the cookie will lose its signature almond taste and become more like a plain sugar cookie. For the best flavor, choose a finely ground almond flour; the finer it is, the smoother the cookie.
Granulated Sugar: Sugar caramelizes as the cookie bakes, giving it that golden crust and a subtle sweetness that balances the nuttiness. If you replace it with honey or maple syrup, the cookies will bake faster and may become overly sticky. Keep the sugar at room temperature for a smoother mix.
The Texture Crew
Egg White: Whisked to soft peaks, the egg white adds lift and creates a light, airy interior. It’s the secret to that melt‑in‑your‑mouth feel. Without it, the cookie would be dense and chewy. If you’re allergic to eggs, you can try a flax egg, but the texture will differ.
Butter: Butter brings richness and helps bind the ingredients together. Using room‑temperature butter allows it to mix evenly, preventing lumps. If you use melted butter, the cookies will spread too much and become flat.
The Unexpected Star
Almond Extract: Just a teaspoon is enough to elevate the almond flavor without making it taste artificial. This extract is more potent than fresh almond oil, so a small amount goes a long way. If you don’t have almond extract, you can use a splash of almond milk, but the flavor will be milder.
The Final Flourish
Sliced Almonds: They add texture and a nutty crunch on top. Toast them lightly before adding to enhance their flavor. If you don’t have sliced almonds, chopped almonds will work, but they’ll spread more evenly and create a different bite.
Baking Powder & Salt: These leavening and seasoning agents keep the cookies from becoming too flat and too salty. Baking powder also reacts with the acidity of the almond flour, creating a slight lift. If you omit the salt, the cookies will taste bland.
Everything's prepped? Good. Let's get into the real action...
The Method — Step by Step
- Preheat your oven to 350°F (175°C) and line two baking sheets with parchment paper. This ensures even baking and prevents sticking. Keep the sheets at room temperature; cold sheets can cause uneven baking.
- In a medium bowl, combine the almond flour, granulated sugar, baking powder, and salt. Whisk them together so the dry ingredients are evenly distributed. This step is critical for a uniform cookie.
- In a separate bowl, beat the butter until it’s creamy but not melted. Then fold in the almond extract. The aroma will fill the kitchen instantly, and the butter will act as a binding agent.
- Whisk the egg white to soft peaks. This takes about 2–3 minutes with a hand whisk or less with a stand mixer on low speed. The peaks should hold but still be slightly droopy.
- Fold the beaten egg white into the butter mixture gently. This step is the moment of truth; over‑mixing will deflate the batter and ruin the airy texture. Keep it light and airy.
- Add the dry mixture to the wet mixture and stir until just combined. A few streaks of flour are fine—do not over‑mix. The batter should be thick but spreadable.
- Fold in the sliced almonds. They’ll add crunch and a nutty finish. Make sure they’re evenly distributed to avoid pockets of almond.
- Drop tablespoon‑sized spoonfuls onto the prepared baking sheets, spacing them 2 inches apart. The cookies will spread slightly, so give them room to expand.
- Bake for 12–14 minutes, or until the edges are golden brown and the centers feel set. The cookies should still be slightly soft in the middle; they’ll firm up as they cool. This step is where the magic happens.
- Remove from the oven and let the cookies cool on the sheet for 5 minutes before transferring them to a wire rack. This resting period allows the cookies to set and prevents them from breaking.
That's it — you did it. But hold on, I've got a few more tricks that'll take this to another level. From dusting powdered sugar to perfecting the cookie’s final crunch, these insider tips will make you a cookie connoisseur.
Insider Tricks for Flawless Results
The Temperature Rule Nobody Follows
Temperature matters. Many bakers bake at a high heat, which can cause the cookies to spread too much and burn the edges. I recommend setting your oven to 350°F (175°C) and using an oven thermometer to ensure accuracy. If your oven runs hot, lower the temperature by 25°F and add a few extra minutes to the baking time.
Why Your Nose Knows Best
Smell is your best judge. As the cookies bake, the aroma will change from buttery to golden. When the scent is warm and nutty, you’re almost there. If you smell a hint of burnt sugar, pull them out immediately to avoid over‑baking.
The 5-Minute Rest That Changes Everything
Resting is key. Letting the cookies sit on the baking sheet for 5 minutes allows the structure to set. During this time, the sugars continue to caramelize, giving the cookies a deeper flavor. Skipping this step will result in cookies that crumble when you try to move them.
The Perfect Dusting
Powdered sugar isn’t just for looks. A light dusting of powdered sugar after the cookies have cooled creates a sweet, delicate finish that balances the buttery richness. Use a fine sieve to avoid clumps. If you prefer a less sweet cookie, skip this step.
The Secret to a Crisp Edge
Crumbly edges are a sign of success. They indicate that the cookies have baked evenly and that the butter has fully melted. If your edges are soft, you might need to bake a minute longer or increase the oven temperature slightly.
The Quick Cooling Trick
Cooling on a wire rack is essential. It allows air to circulate around the cookies, preventing them from becoming soggy. If you leave them on a flat surface, the bottom can steam and lose its crispness.
Creative Twists and Variations
This recipe is a playground. Here are some of my favorite ways to switch things up:
Cocoa Almond Crunch
Add cocoa powder. Replace 1/4 cup of the almond flour with unsweetened cocoa for a chocolatey twist. The cocoa will deepen the nutty flavor and give the cookies a chocolatey crunch.
Maple‑Infused Munchies
Swap sugar for maple syrup. Use 3/4 cup of maple syrup instead of granulated sugar. The result is a slightly sticky, caramel‑like cookie that pairs wonderfully with a cup of tea.
Nutty Coconut Surprise
Mix shredded coconut. Add 1/4 cup of unsweetened shredded coconut to the batter. The coconut adds a tropical aroma and a chewy texture that complements the almonds.
Spiced Ginger Glaze
Top with a ginger glaze. Drizzle a simple glaze made with powdered sugar and a splash of vanilla extract, then sprinkle ground ginger over the top. This adds a warm spice that works well in the fall.
Chocolate‑Chip Delight
Drop in mini chocolate chips. Fold in 1/2 cup of dark chocolate chips before baking. The chips melt slightly, creating pockets of chocolatey goo.
Salted Caramel Burst
Add caramel bits. Mix in 1/4 cup of caramel bits for a sweet‑savory explosion. The caramel adds a buttery sweetness that pairs nicely with the almonds.
Storing and Bringing It Back to Life
Fridge Storage
Keep them airtight. Store cookies in an airtight container at room temperature for up to a week. The airtight seal prevents moisture from seeping in and keeps the cookies fresh.
Freezer Friendly
Freeze for longer shelf life. Place the cooled cookies in a freezer‑safe bag or container. They can stay fresh for up to 3 months when frozen. When you’re ready to enjoy, let them thaw at room temperature for 30 minutes.
Best Reheating Method
Warm them in the oven. Preheat your oven to 300°F (150°C) and place the cookies on a baking sheet. Warm for 5–7 minutes or until they’re fragrant. Add a tiny splash of water to the bottom of the pan to create steam and keep the cookies moist.
Conclusion If you’ve followed along, you now have a recipe that’s guaranteed to impress. These cookies are a testament to how a few thoughtful tweaks can transform a simple batch into a culinary masterpiece. From the precise whisking of the egg white to the final dusting of powdered sugar, every step is a celebration of flavor and texture. Whether you’re serving them at a gathering or enjoying them with a cup of tea, these gluten‑free almond cookies will become a new favorite in your pantry.